Saturday, December 25, 2021

Left Wing - Primer Test & Deburring


Last night I decided to do one more priming test piece just for fun: surface wiped down with acetone only vs light manual scuff and clean. This sample in the picture is less than 24 hours old and was sprayed in a 45 degree garage, so far less than ideal. I'm sure it's not fully cured, but I think it is enough to give a verdict and direct my future process.

The portion on the top is the scuffed part and the bottom half is the "cleaned only" part. There's no doubt that the scuffing makes a significant difference in the adhesion. That being said, I did some very aggressive scratching. Yes, the surface that was not scuffed definitely lifted easier compared to the other surface, but it still took a pretty significant amount of abuse. Once the primer came up, it did pull up in bigger chunks, as expected. I didn't take a picture, but I also tested how easily each side came up using acetone. EkoPrime is not solvent resistant, but the scuffed side still took a decent amount of rubbing with acetone to clean the surface. The cleaned only side softened up a lot faster and lifted in sheets.


My verdict from this test and the one I did before it a few months ago: I used to do pretty serious manual scuffing while acid etching. At least for EkoPrime, that's overkill. The acid etch alone (just using it to clean the surface, but not manual scuffing at the same time) is very nearly on par with manual scuffing, but I'd give the manual scuff a very slight lead if I had to choose. The cleaned but not scuffed parts surprised me by how well the primer still stuck. I would not take that approach on parts that are going to get some abuse, but for anything that just needs coverage and will be buttoned up without getting beat up, I wouldn't be concerned in the slightest about spraying EkoPrime directly on the cleaned surface with no scuffing. It performs far better than my self etching spray can primer does.

Given all of this, my process is going to change a bit since it sure looks like I was going overboard in prepping my surfaces.  By scuffing along with acid etch, I was doing what is undoubtedly the best approach, but in reality, I don't think what's "best" is anywhere near worth the extra effort!  It's like one of my old profs used to say, "if you get a 90% on one of my tests, it means you're ahead of the curve and going to be a very knowledgeable doctor.  If you get a 95%, it means you studied twice as hard to learn a few bizarre facts that will never matter in the real world. Decide what matters to you, sleep or perfection." I always studied for the 95, but I think age has caught up with me.  The added sweat and irritation to make the primer bullet proof will never actually matter in reality.


I really dislike the mess and process of acid etch/detergent because of the steps and time involved to etch and scuff, rinse, dry, etc. For most pieces, I'm no longer going to use the acid etch. I will lightly scuff, wipe down with acetone, and shoot primer. My manual scuffing is going to change as well. I really went at it before, and it not only took a lot of time, but was exhausting and I dreaded it. My last tests were on pieces that were scuffed using a Scotch Brite pad on a random orbit sander. It looks like it barely scuffs the surface, but it takes the shine off of an entire wing skin in no time at all with no effort. I never scuffed parts before dimpling because I wasn't sure that the primer would hold up to the dimpling. That's not the case. Scuffing before dimpling is 100x easier and no concern at all. For parts that just get covered and sit there inside and never get touched, I'll scuff, but I won't lose sleep over hitting every square inch. Those parts would be absolutely fine with no scuff at all. That's exactly what Stewart Systems said when I asked. I will make sure I scuff any parts that need the toughness factor though.

When coupled with Devilbiss Dekups, the EkoPrime becomes almost as convenient as a rattle can primer because it's waterborne and doesn't have a pot life (where it is only good for X minutes after mixing the catalyst in, like an epoxy primer does). I mixed up a batch of primer a month ago, meaning I added a tiny bit of water, and I didn't use all of it. A few ounces were poured in a small mason jar, and the rest stayed in the flexible plastic Dekups container - all of the air pushed out and the plug put in. Yesterday I wanted to prime a single part, so just pulled out the Dekups container, gave it a little swirl to mix it all up, and primed the piece. Clean up is a 60 second task with hot water. The small mason jar is what I use with a Qtip to hit random areas. It's still good to use a month later. I love the waterborne primer for this reason. The lack of the toxic smell that epoxy primers have is a big bonus as well.  The epoxy primers are definitely tougher and offer better corrosion protection (they actually create a barrier over the primer that keeps water out, whereas the waterborne primers technically don't), but again, what's "best" is a very different thing than what is reasonable.  Given the unprimed 50 year old planes I've seen, I figure my plane will probably last 75+ years with the "not best" primer treatment I've given it.  I'm not sure I care if it lasts 150 years.

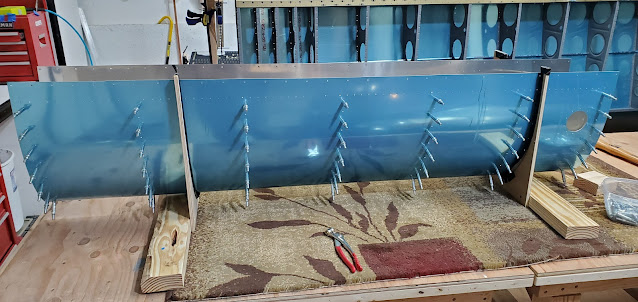
In terms of actual work today, it was pretty ho-hum.  I started deburring all of the wing skins.  I'm down to one more skin to go, then I'll move on to the leading edge.  One thing I did figure out today is that removing the plastic sheets is far easier by rolling it onto a broom handle.  Pulling the plastic off by hand is terrible!  Rolling it onto a handle using a vice grip for leverage, it comes right off in a matter of seconds.


Friday, December 24, 2021

Left Wing - Dimpling

It's dimpling time!  I dimpled all of the ribs using the squeezer, then dimpled the rear spar.  Van's also says to slightly countersink the holes in the rear spar so that they better accept the dimpled skin. This is simply because of the thickness of the material, so it doesn't dimple quite as deep as it should.  I used my deburr bit to just take a bit of material out of each hole.


The hole for the pitot tube is just a small pre-punched hole in the spar that has to be upsized.  I counted, recounted, and counted again to make sure I was drilling in the right spot.  The hole gets drilled to 7/16", through the skin as well as the spar.


The monotony hadn't quite gotten to me yet, so I soldiered on and countersunk all of the holes in the spar for the skin rivets.  That was A LOT of countersinking - both top and bottom sides.


Thursday, December 23, 2021

Left Wing - Prep Work

The other day I had a goof on the inboard tank rib, and after talking with Van's I've decided to order a replacement.  It'll be a while before the part is available, so I'm shifting gears and moving back to the wings.  The next step for the wings is to take everything apart, deburr edges and holes, prime, and dimple/countersink everything.  I pulled the top inboard skin off first to bevel the edge that gets layered underneath the outboard skin. It's easier said than done to take a file and sandpaper to perfectly good skins that you've spent hours and hours working on!  You can't see it in the picture, but the edge is beveled down to almost a knife edge.


Then came the part that I've been dreading - deburring all of the edges and holes of the skins.  I did figure out an easier way to remove the blue plastic at least.  That stuff is a serious pain!  It's way easier to wrap the first few inches around a rod (used the broom) and roll it off.


Off to the races!  I was hoping I could just hit the holes with Scotch Brite like I had on some other parts, but this material is thicker and stiffer and has a bigger burr on the holes. I have to hit each individual hole with the deburr tool.  I got the wing walk, inboard skin, and inboard stiffener done.


Tuesday, December 21, 2021

Left Wing - Fuel Tank (6)

I need to do a little priming soon to be ready to seal the tanks, but the temperature in the garage hasn't been all that conducive to it. It looks like we may get a 15 degree bump tomorrow, so maybe that'll be my window of opportunity for the week.

Today I fabricated a couple of parts that attach to the inboard tank rib.  The first is a piece that inserts into the inside of the tank and helps to cover the notches in the rib flanges.  This will get sealed to the rib and also seats against the skin and seals there.


The other piece to fabricate was the inboard attach angle that connects the tank to the fuselage.  This was very thick aluminum angle, so took a lot of cutting, filing, sanding and work on the scotch brite wheel to get right.


After the basic shape was done, I drilled the holes that will connect the angle to the inboard tank rib.


The angle fits in the nose of the rib and gets match drilled.


Lastly, the inner trim piece gets match drilled using the new reference holes in the rib.

A couple of hours for two pieces! I thought I might do the second tank at the same time to speed things up, but realized that I wouldn't be able to get very far since I don't have the room to put the 2nd wing spar in a jig before the first one is done (to drill the tank and Z brackets to).  I'll just have to try to remember all of the lessons I've learned on this side.


Monday, December 20, 2021

Left Wing - Fuel Tank (5)

I spent most of my time reading up on fuel tank sealing tonight (and re-watching the Van's video).  For whatever reason I just didn't have a lot of motivation to get out in the garage, which I've learned is a definite reason for me not to.  Many of my best idiotic mistakes have come when my head just wasn't in the game for one reason or another.  I did go out for a few minutes to do a couple of steps, just to feel like I'd made some progress today.

The inboard Z bracket for the fuel tank attaches using 3 bolts, but unlike the other Z brackets, the inboard one has the nutplates attached to the spar vs attached to the bracket itself.  Usually attaching nutplates is pretty easy, but the location of these created a little bit more of a struggle.  To start with, the outer rivets (the ones that are angled) are too close to the edges of the spar web, so the countersink cage won't fit.  Even grinding down one side of the cage wouldn't have made a difference.  For those countersinks, I took the cage apart (still needed the innards to hold the countersink bit) and very, very careful countersunk by eye.  I went super slow, and in the end it worked out just fine.  Maybe a little uneven, but the reality is that the rivets holding on nutplates aren't structural.  Their purpose is solely to hold the nutplate in place to accept the bolt.  They can be pretty ugly and still accomplish that.  The access underneath was also really bad, so bucking the rivets made the shop heads pretty ugly too, but solid enough for nutplates.  I wasn't happy that a couple of the manufactured heads did sit proud of the surface of the spar, which would interfere with the Z bracket a little bit (very little, but still, this thing holds a fuel tank on).  Because of the access underneath, I don't think I would have done any better on attempt two, so instead of drilling them out I just hit them with the 1" Scotch Brite wheel, essentially sanding them level with the surface.  The photo doesn't show that part, but you can see one or two of the rivets sitting above the spar.


I also finished deburring the edges of the Z brackets and countersinking the holes for the nutplate rivets. These brackets are very simple but took a kind of ridiculous amount of time to finish, between the number of times you have to put them on the tank, the tank on the wing to drill, back off to do nutplates, etc.  They still have to be cleaned and scuffed so they can be primed.


Sunday, December 19, 2021

Left Wing - Fuel Tank (4)

I've now reached the point where progress looks backwards in pictures.  I have a few more things to fabricate for the fuel tank, but for the most part, now I have to start disassembling everything and doing all of the prep work of deburring, dimpling/countersinking, scuffing, priming, etc.  I can't say that I'm looking forward to all of that repetitive, mindless work, but it's part of the deal.

I fit the backing plate for the stall horn access plate to the wing.  The more I think about this, I don't think I'm going to install the device itself.  It's set to give an audible warning about 10 mph above the stall speed. I'll keep thinking about it, but I don't think having a separate warning on top of the AOA information will be helpful.  Too much information can be worse than no information sometimes.  I'll have the access panel available if I do decide to install it later.  If I ultimately get to the point of closing up the wings and decide not to do the stall horn, I'll just fill the pre-punched holes with micro/fiberglass.


I pulled the tank off of the wing to start disassembly and prep work.  I drilled the large holes in the skins for the screws that connect the tank to the spar.  Then I drilled the temporary pop rivets out of the Z brackets and worked on the row of tank skin to baffle holes.  Normally these holes would just be dimpled because of the material thickness, but Van's says to countersink them instead in order to allow the baffle to slide into place easier once assembling with proseal.  It felt like it took forever to do, moving clecos over and over and over (move them once so I could peel the blue plastic off, then replace them to countersink the first holes, then move them to countersink the other half, then do it all again on the other side of the tank).


After all of that, things pretty much look the same as when I started.  The only real evidence of all the work is the volume of aluminum shavings all over the place.


I pulled the Z brackets off the baffle.  All but the innermost bracket get nuplates attached to them (captures the bolt that goes through the spar to attach the tank to the wing).  I used a nutplate as a template to drill the rivet holes.  I actually have nutplate jigs to do just this task, but of course I don't have this particular screw size.  The rivet spacing is the same for all of them, but the large center hole varies in size.  The closest one I have is too sloppy to be reliable.  All I could think was that if I had a 3D printer I could create a sleeve to go around the center pin in the jig and it would have worked great.  I do have a printer coming as a Christmas present, but like everything these days, it's backordered for at least 6 weeks.  I got the brackets drilled and deburred eventually.  Tomorrow I'll start by deburring the edges and cleaning them up for priming.


Saturday, December 18, 2021

Left Wing - Fuel tank (3)

The fuel tank is attached to the front wing spar using Z brackets, and of course they all face different directions depending on the location just to be confusing.


The kit supplies a couple of templated drill guides to drill the first center hole in all of the flanges (minus the inboard spar flange, which gets drilled later).


I drilled all of the center holes in the Z bracket flanges, then measured and drew a line down each flange (to line up in the holes of the baffle when match drilling).  The brackets were then drilled to match the baffle holes.


The last step for preparing the Z brackets was to upsize the hole in the flange that goes against the wing spar.  The side of the bracket that goes against the baffle gets riveted on (pop rivets), but the side that attaches to the spar gets bolted on.  Of course things were going great until I drilled the very last bracket.  For whatever reason, my brain just disconnected and instead of enlarging the spar side hole, I enlarged one of the holes on the baffle side of the bracket.  Oops.  There's no saving this since these brackets have to get sealed as part of making the fuel tank leak proof.  So I pulled one of the Z brackets for the other tank just so I could keep going.  I'll have to order a replacement bracket from Van's so I have the parts when I'm ready to do the right tank.  I looked it up and it's a whopping $2.50 part, but of course will be $10 to ship it here.  At least it's better than messing up an expensive part!


I didn't get a picture of it, but the Z brackets don't actually get clecoed onto the baffle for the initial fitting with the wing spar.  The clecos are too long and interfere with the fit against the spar, so instead I had to attach temporary pop rivets.  Van's supplies some "soft" pop rivets that will supposedly be easy to drill out later once I'm done fitting the tank to the wing.  I'm skeptical.  I'm guessing they'll be harder to drill out than they say they are.


I laid the tank on the spar and clecoed the skin in place.  Ultimately the skin gets screwed to the spar, but for the time being 1/8" clecos fit tight enough in the spar nut plates.  The Z brackets were then match drilled to the holes in the spar.


The tank fit fine except for the outboard portion where it fits up against the other leading edge skin (where the joint plate is).  It not only had an uneven gap between the skins, but the profile of the leading edge didn't line up well.


I did some digging online and it sounds like this is a pretty common problem.  Since the gap was tight at the aft edge near the spar, I decided to take all of the spar clecos out (thankful for the pneumatic cleco tool at this point) and put a temporary shim under the inboard end of the tank to lift it up and even out the gap a bit and then start clecoing from the outboard edge in.  I also gave the nose a tap with a hammer/block to push it down even with the outboard leading edge skin.  Doing it in that order, I was able to even things up pretty well.  From what I've read, this slight gap all but disappears once the wing is painted. 


In reality, it's pretty tight when not looking at it from inches away - flush on the aft edge and maybe 1/32 on the front edge.


Even though there's very little likelihood of the wing having any twist because of the pre-punched parts, I need to check it to be sure.  That requires putting the bottom skins back on and dropping a plumb bob from the front spar and measuring the distance to the rear spar.  That'll be where I start tomorrow.


Friday, December 17, 2021

Left Wing - Fuel Tank (2)

I got a surprise from Dad in the mail today - a pneumatic cleco tool!  I had eyed these before, but figured it was a luxury item I could do without.  Well, it may not be a necessity, but it sure is nice!  I used it a little tonight and it really makes clecoing effortless.


I actually didn't go out to the garage to do any work tonight.  I thought I'd just try out the cleco tool and clean up so I could be ready to get to work on Saturday.  One thing led to another though, and before you know it I was marking stiffeners to be cut for the tank.  But of course, once they were marked it was silly not to at least cut them into lengths, even if I wasn't going to finish them.  But after they're cut, it just makes sense to go ahead and sand them to rough shape.  But leaving them rough is just silly, so I might as well deburr the edges on the Scotch Brite wheel.  By then the stiffeners were done and I could go to bed.  Orrrrrr, I may as well just see how they fit on the tank.  They fit just fine, so I suppose it doesn't hurt to just final drill them...


Wednesday, December 15, 2021

Left Wing - Fuel Tank

I felt bad about leaving the dogs alone (their mom is on a work trip) so not much accomplished tonight.  Well, not much progress, but a lot accomplished because I finally figured out the secret to handling leading edge skins!  The instructions want you to put the skins into a cradle and basically try to force the noses of the ribs down into the skin until the holes line up.  As I've proven night after night, that's almost an impossible task because of how stiff the skins are and how flimsy the ribs are.  It turns out the secret is to ditch the cradle at first and ROLL ribs into place, not push them.  I put just one cleco into the forward most hole on the top side, then with a support piece under the skin, pivoted the rib away from that first cleco, basically rolling the rib into the bend of the skin.  Doing that, it was pretty much a non-event to get the cleco on the bottom side in place.  After that, the rest of the holes were pretty easy.  Once about half were done I did have to put the assembly into the cradle to pull the skins together.  In all of my reading I never came across people describing the roll.  I sure wish I had, because it made all of the difference in the world.  It took a process that was hours of struggle and turned it into a 10 minute task.


Monday, December 13, 2021

Left Wing - Leading Edge & Fuel Tank

First things first tonight - finish the leading edge skins.  The last piece of the outboard leading edge is to point a joint plate and end rib at the inboard end of the skin.  This rib has no holes in it (no idea why - probably have to leave a few holes out to hit the 51% rule I guess), so has to be drilled in assembly.  As if getting ribs in place on their own wasn't hard enough, this rib not only gets slid into the skin, but also has another strip of aluminum that sandwiches in between it and the skin.


I used a rib as a template and attempted to pre-bend the joint plate at a reasonably close spot so I could then mark it and cut it to length before attempting to slide it into place.  In order to get it slid into the skin the correct amount, I also marked a line down the length of it where the skin holes should end up.


While it was indeed tight, it actually ended up being a little easier than I thought it would be.  I clecoed the rear flange of the rib to the spar and slid just the bottom end of the joint plate into position.  There was no way I was going to "just slide it over the leading edge" of the nose rib without some persuasion from a rubber mallet, so I got things lined up as best as I could at the bottom and drilled one hole to put a cleco in and hold it in place while I wrestled the rest into position.  About a thousand taps later, I had the rib where it needed to be (even with the skin edge) and also had the joint plate in place.  I drilled all of the holes and clecoed it all together.  After that, I still needed to ream all of the leading edge skin holes to the proper size, so I did that and officially finished that portion of the wing.  Well, sort of.  I still have to figure out what I'm going to do about the holes and access panel that are in the skin for the stall warning horn.  It sounds like the newest kits don't typically include these cutouts since the glass panel systems these days all come with AOA capability.  I may just button up the access panel and fill the holes.  A decision for another day though.


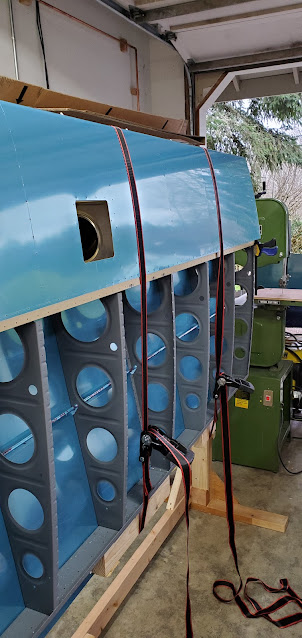
And with that, it's time for another leading edge fight, this time with the fuel tank.  I figured I might as well try Van's technique again.  I mean, you would think they've figured out the easiest method for all of this.  That would be a big fat "no."  I put the skin in the cradle and inserted the ribs.  Of course one side is very easy to get into position, which gave me a false sense of how this was going to end up.  When I moved to the other side, it became apparent immediately that this was going to be even worse than the outboard leading edge skins.  I am out of energy for today, so I just hung it up for the night.  I'll put together a better system another night. I think the ratchet strap setup is the way to go as long as I can spread the pressure from the strap out along all of the ribs to keep any from bowing.


Sunday, December 12, 2021

Left Wing - Leading Edge

Today I figured out a few things I'll do differently on the next wing, and I also stumbled through some stuff that I'm still not sure how I'll handle it on the next wing.  The leading edges are a bear!  I started by removing the bottom skins and clecoing the leading edge ribs to the front spar just to get an idea of how all of this was going to go together.  As is somewhat common, I found a number of things that didn't quite jive with the plans, but after a little investigation and piecing parts together I got it all sorted out.  Most of the leading edge ribs are identical, minus being right or left handed flanges, but a little minor surgery is needed for one of the ribs to clear the spar rivets.  I trimmed enough of the flange of the rib to fit around the spar rivets, only realizing after the fact that it probably would have been a whole lot easier to instead drill a hole to fit over the rivet. Oh well, I'll do that on the next wing.  The instructions don't mention the need to match drill extra holes in the two inboard ribs, but there are obviously holes in the spar for this, and the plans themselves show rivets there.


Now for the "fun" part: figuring out how to seat the ribs in the leading edge skin.  It's a well known nightmare, and now I see why.  The skins are thick, and they are exceptionally tight.  Van's says to put everything in a cradle and deal with it there, but just about everyone says it's nearly impossible that way. I had seen an example by a well known builder who put the ribs and skin on the front spar and then used ratchet straps to pull it down and line up all of the holes, starting on the leading edge on the top and working down.  I put a 2x4 against the rear spar to spread the load a bit and gave it a shot.  It worked well for a few holes, but then it got so tight that I could see the rear spar starting to bend (not enough to deform or anything, but definitely moving).  So I gave up on that solution.  I think it might have worked if I had left the bottom skins on to help keep the ribs and rear spar more rigid, as well as using a longer 2x4 to spread the load out across a much larger section of the rear spar.  I think I will try that on the next wing if I can't find a better way.


I still liked the idea of using ratchet straps, but the execution needs to be different.  I tried a similar approach with the leading edge on the bench.  This time I extended 2x4s across the rear of the ribs and just ratcheted against those.  Unfortunately it didn't have nearly the same effect as when the assembly was on the wing for some reason.  It barely moved the skin so the holes (probably 1/4" out) still didn't line up with the ribs.


I finally gave up on the ratchet strap idea and thought I'd give the Van's cradle method a try.  I cut my horizontal stabilizer cradles to accept the larger ribs and gave it a shot.  Talk about a non-starter.  Once you put it all in the cradle the ribs don't budge at all.  I huffed and puffed for 30 minutes and might have gotten one cleco in.


The leading edge rib holes are the key to getting these skins to fit.  Once you get the first couple of holes done, the rest line up pretty easily.  For method 427 I grabbed a clamp, and at least for the end rib, it actually worked really well to bring the nose holes inline.  Unfortunately it only works for the end.


It seems like it took forever, but I did finally get all of the ribs pushed into place.  I did not learn the magic secret to make the next one any easier.  I'll have to do some research to see if anyone has come up with a creative way to handle these.  I think the ratchet straps with everything on the wing are a good idea as long as I can figure out a way to keep everything from shifting while I tighten it down.

Once I was done with the leading edge assembly, I transferred it back to the wing and clecoed the ribs in place and the skins to the front spar.


Saturday, December 11, 2021

Left Wing - Match Drilling

Today was all about moving clecos over and over and over.  I match drilled the top skins - lots of work with very little to see for progress.


Next came the J stringers, which get threaded between the ribs and the top skin to stiffen things up.  There are two stringers that meet and overlap each other at the same spot as where the inboard and outboard skins overlap.  I cut them to length to terminate at the inboard and outboard ribs and marked a centerline to help locate everything through the holes in the skin for drilling (turned out to be unnecessary because there's so little wiggle room to begin with).


Next up were the bottom skins, which follow the same process as the top skins. The only difference is there are no J stringers or wing walk doublers for the bottom skins.  I hung the bottom skins, then got to match drilling.  By the time everything was said and done, my clecoing hand was spent!


Things start to get a bit more complicated now.   I need to spend some time doing research about the next steps - leading edge ribs/skins and the tank.  The leading edges are super tight to fit and there are a number of different ways I've seen people tackle them.  The Orndorff (sp?) video I have about putting the wings together goes against the normal Van's method a little bit.  Van's has you build the leading edges in a cradle, much like the horizontal stabilizer.  The problem is the skin is much thicker and much tighter than the horizontal stabilizer, so apparently it's quite a fight.  Orndorff actually builds the leading edge on the spar and snugs the skins down onto the ribs using ratchet straps.


Friday, December 10, 2021

Left Wing - Top Skins

I didn't intend to do much work tonight, but before you know it, 10 minutes of "just leveling the spar" turned into 3 hours.  Funny how that happens.  Once I get going, it's just tough to stop.

I decided to go with an extremely basic solution of taking the sag out of the spar.  The reality is that the pre-punched holes do 99% of the work of keeping the wings from having any twist, so the support in the middle of the rear spar is simply there to help in getting the holes to line up.


The first step in working on the skins was to create the wing walk doubler.  That just comes as a plain sheet, not drilled, so I laid it out as described and clamped it to the pre-punched skin, flipped it over and match drilled 3 holes in each rib location.  I'm not sure why they don't just have you drill all of the holes at once, but they specifically say to only do 3 per rib for some reason.  Maybe I'll realize why that is the case at some point, but so far it doesn't really make much sense to me.  Leaving all of the other holes undrilled means it'll have to be done in assembly with the ribs. That's going to make it awfully easy to miss the existing rib holes and potentially enlarge them (the wing walk skin is sandwiched between the pre-drilled skin and the pre-drilled ribs, so it's going to be an interesting exercise to get the rib and skin holes to line up).


I clecoed the inboard top skin and wing walk doubler to the main spar and started clecoing the ribs and rear spar to the skin.  That's when I had my nightly "well that was stupid" moment.  It happens about once a night.  I couldn't get one of the ribs to line up with the skin.  After looking at it and the plans for a minute, I realized that I had riveted the rib to the rear spar in the wrong location.  There are two identical sets of 3 holes next to each other in the rear spar.  I thought I had it correct, but didn't see on another drawing that the rib goes in the outboard 3 holes because there is a hinge bracket that goes in the inboard 3 holes.  Oops.  Normally drilling out rivets is pretty easy, but the rib is a pretty tight spot, plus it was already assembled.  I tried drilling them out how you typically would, but there just wasn't enough room.  I tried a 12" bit to give the drill a little more room to get perpendicular to the rivet head, but it was too difficult to center such a long bit. I finally pulled out my die grinder with a small 1" Scotch Brite wheel on it, protected the rib and spar with cardboard, and ground down the rivet head a bit until it was flat and thin.  Usually you drill through the manufactured head to pop out a rivet, but since I couldn't center a bit very well, I decided to go from underneath on the shop head.  I took a #30 bit and drilled through the rivets until I popped them all out.  I did enlarge the holes in the spar a little bit, but not enough to matter.  With that done, I riveted the rib back into the correct location and continued clecoing the skins on.  This photo is before I moved the rib.  You can see how far off it is from the skin holes.  In the picture it looks like there are only two holes to the right of where the rib is, but there are 3.


Having sorted out my rib problem, I finished clecoing the inboard skin.  I started to put things away to call it a night, but one more cleco turned into another one, and another one, until I had the inboard and outboard top skins all done.  I had a slight problem with getting the overlap of the two skins to line up perfectly, but just sliding the rear spar vertical support over a few inches moved things just enough to allow the holes to line up.