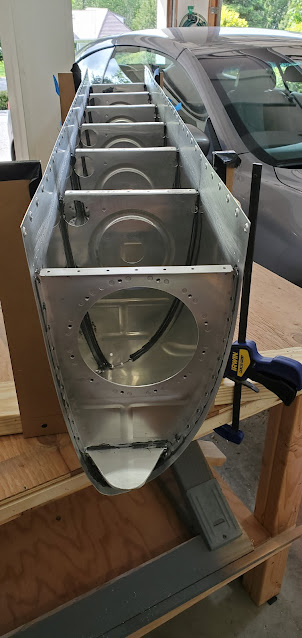
The inboard and outboard tank ribs were the last to seal. These were much easier than the rest simply because of the fact that I could use the squeezer for them. Because of that, I just set the rivets wet instead of waiting for the proseal to partially cure like on the rest of the ribs. It wasn't nearly as messy as the other ribs regardless, since the only leak path is on the inside portion of the rib. That means that the proseal doesn't really have to be spread on the entire rib flange to where it squeezes out the outside edge and through the rivet holes. I know a lot of people do that, but as long as there is sufficient proseal on the inside edge, it shouldn't really be necessary and just causes more mess.
Friday, May 27, 2022
Left Fuel Tank - Sealing (4)
The outboard rib has a tooling hole that has to be covered up. I just made a small aluminum rectangle, spread proseal on it, and riveted it over the hole (then put proseal over the rivets of course). These ribs also have an extra piece in the nose that gets riveted on the inside to help cover up the notches in the flange. I don't know if they're structural or not. I think they may purely be there to be a more solid barrier to help with better sealing.
The inboard rib was much the same, except that it doesn't have the same tooling hole to cover up, and it also includes the big angle attach bracket that eventually connects to the fuselage. That attach bracket is the only part I had problems with. The -4 rivets are really long and take quite a bit of force to set. I got all of them done just fine except for one where the rivet set bounced off and really made of mess of the rivet head. As soon as the proseal sets a bit I'll drill that rivet out and reset it.
I still have about a half dozen rib/skin rivets to set that I need some help with. After I'm done with those I will do a final internal sealing of all the flanges and rivet heads and move on to installing the rest of the tank hardware before I close it up.


