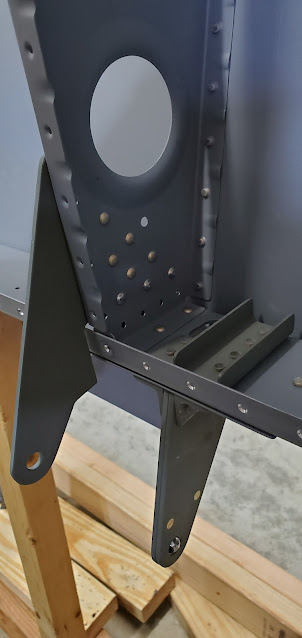
I'm finally moving on from playing in proseal! I have to say, while I'm no longer afraid of working with the stuff, I'm definitely glad to move on to some other types of build again. The brackets that attach the flaps have a little minor fabrication to be done of some aluminum angle. Van's doesn't label the angle stock, so I had to dig around in the crate to figure out which pieces to use. A few of the pieces are pre-cut to length because they also have a bend that the factory puts in one edge (to clear the wing's rear spar flange). The others are cut from a long piece of angle. I cleaned everything up and deburred the edges.
A lot of the holes that have to be drilled in the ribs to match the brackets are in very tight quarters. Too tight to get a regular drill in. I had read this ahead of time in the instructions, so I bought a right angle drill attachment. A regular right angle air drill is ridiculously expensive for some reason, but for $30 I got a nice Dewalt right angle setup that uses hex bits. It has multiple attachments, so can either be driven directly by the drill, or it also has a flexible shaft. I just used it directly attached to the drill for this work, but I can definitely see how the flex shaft could come in handy someday. A worthwhile $30.
After drilling all of the brackets (3 for the flaps), I got them riveted in place. It was a mix of using the squeezer and the rivet gun, depending on the rivet location. The bottom row of holes, as well as the holes by the rib flange (lower wing surface) don't get riveted until the angle pieces I made above are match drilled and riveted at the same time.
The instructions have you pull a string line between the inboard and outboard flap brackets to ensure that the middle bracket hole is lined up properly prior to drilling it to the rib (the internal most rib is the only one that is completely pre-drilled, but the middle and outboard ribs just have two holes drilled in the ribs for reference, then the rest of the holes get match drilled from the pre-drilled brackets). I think this instruction must be a leftover from when this middle rib didn't have any holes drilled in it though. With the reference holes that the rib came with, there's really no way to move the bracket. I double checked with a string line though, and sure enough it's spot on as-is.


