I'm sneaking up on the last few items to do before the entire fuselage gets pulled apart for deburring, dimpling, priming, etc. That's exciting, but also exhausting to think about - that's a lot of dimpling, countersinking and riveting to do!
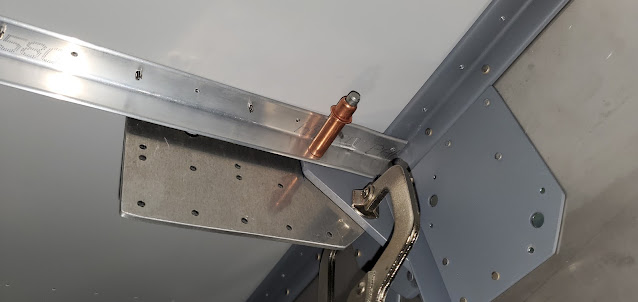
The floor stiffeners are the last pieces left to do in the forward fuselage. There are four of them - long pieces of angle that have a jog at each end so that they can lay flat to the skin and then go up and over the firewall aluminum angle and spar bulkhead flange. The two center stiffeners attach to the big F-601J angles at the firewall and also attach to the cover support ribs on the front side of the forward section bulkhead.
Laying out the holes on the firewall angle is pretty much impossible at this stage (no idea why they tell you to wait - it would have been far easier to do when fabricating the piece before it was riveted to the firewall). I laid the holes out on a thick piece of scrap instead, then clamped that to everything to use as a template.
It took a while to get the measurements correct, but the template ended up making drilling the three holes through the thick firewall angle and into the floor stiffener a non-event. I don't use my pneumatic right angle drill often, but when I need it, I need it! I used it quite a bit today. There's no way I could have done a quality job without it.
The aft portion of the center stiffeners also get riveted to the cover support ribs on the bulkhead. The ribs already have the holes in them though, so for this end it was a quick job to just match drill through to the stiffeners. The two outside floor stiffeners were a bit tougher to deal with initially, just because there is nothing to clamp them to for lining them up. I had to crawl under the fuselage about 100 times to tape them in position, then check the location, crawl back under to move them a little, check, crawl, check, crawl, over and over until I had them lined up and the first holes drilled for clecos.
Next up were the walls of the baggage area. There are vertical and horizontal ribs on each side, and ultimately the bottom portion gets covered up by a few pieces of sheet aluminum to make an inside wall. I drilled a few larger holes in the vertical ribs to make a place to run rudder cables and static tubing (or wiring - depends on how I end up routing the Dynon static/pitot lines).
It's still a bit confusing since the fuselage is still upside down. The blue sheet in the pic below is the inside wall of the baggage compartment. This portion of the wall will be permanently attached, but the forward wall that goes in front of this one will be put on with nutplates. It needs to be removable since it covers up some of the flap control mechanism. I final sized all of the holes for the ribs, skins, walls, etc. The very last thing I have to do before I rip everything apart is drill holes through the end flanges of the vertical ribs into the main fuselage longeron and the bottom skin. I'll tackle that another day.


