Sunday, September 29, 2024

NACA scoops

I just have one last task to do before I throw the front top skin back on and and start fitting the canopy bubble - attaching the NACA scoops to the fuselage skin.  These will be connected to the air vents with scat tubing.  There really isn't much in the instructions about how to deal with these.  Some people rivet them, some rivet and use proseal, some proseal only, etc.  I have a bunch of extra proseal in the freezer, so I'm going to go that route.  Even thought it's a sealant and not technically an adhesive, it will still work just fine as an adhesive for something light duty like these scoops.

I scuffed up the flange of the scoop, put a thin layer of proseal on and stuck it to the skin.

I mixed up way too much proseal, so the hunt was on for where I could use some of it up.  One place that will leak on the tip up is where the seal support angle attaches to the subpanel.  I taped off the area and ran a bead of proseal in the gap.  There are still big gaps between the tabs of the forward flange of the subpanel, but I can't fill those in until the front skin goes on for good.  Once it's on, I'll have to crawl underneath and push proseal up from underneath to seal it.


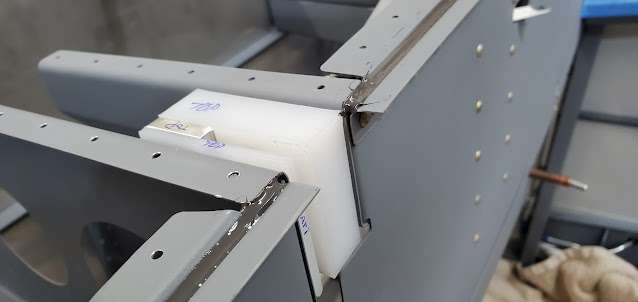
The gap in the seal support angle where the canopy frame hinges go through is going to need some additional work to get rid of a leak path.  It's a spot that people complain about water ingress in rain.  I need to fabricate something that spans the gap and also bumps up over the plastic and under the front skin.  I'll have to play with it a bit to see what works best.  I can either make a single piece of a stepped aluminum sheet and rivet it in, or I could rivet a new piece of seal support in to span the gap, then attach a layer of fiberglass forward of that to cover the gaps between the plastic blocks.  I'm not sure this will be enough to solve the tipup leak issue, but it'll help.  I have a few other ideas for how to really fix the problem.  I just need to noodle on it a bit.


I still had proseal left!  What to fix, what to fix.....Needless to say, that leaky handle on my 5 gallon gas can is now sealed up tight.


Saturday, September 28, 2024

Canopy Frame (4)

The other day I put the forward canopy strut attachments on the frame.  The rear attachments get screwed to the canopy deck.  I measured 100 times, and then 100 more (the rear attachment has to be at the right distance to ensure the struts don't bottom out).  Finally I bit the bullet and drilled the holes in the finished and painted canopy deck.  Oh, and all of the attachment bracket parts used to be painted.  I was really unhappy with how bad the paint turned out though.  I didn't have a great way of holding the parts because of their size, so the paint was blotchy and runny.  I reversed course and sanded off all of the paint. Bare aluminum will weather the high touch areas better anyway.  For some reason the pictures make it look like the aluminum is all pitted and weird.  It's not.  Looks good to the naked eye.

The plans show that the screws through the attachment plate get washers and nuts.  There's no way!  The canopy deck is not only tight to get fingers behind, it wraps around and up, so I'm not sure how they expect you to be able to get washers, let alone nuts on.  After about 30 minutes of dropping the washer and nut for screw #1, I finally got them on the screw, only to struggle for another 15 minutes trying to figure out how to get a wrench on the nut to hold it.  Ridiculous!  I switched gears and decided to use nutplates instead.  I put the nutplates on a small piece of aluminum so I could put the whole thing up inside the canopy deck and not have to hold it steady once the screws were started.  The nutplates have to set way up at the edge of the plate in order to fit inside the canopy deck.  Ideally I would have used the single lug nutplates (one attachment arm on one side vs the dual lug version with an arm on each side), but I don' t have any of those in the #8 screw size.  I had to cram two normal nutplates together.  It's ugly, but worked.


The struts are pretty beefy, and the frame is definitely over sprung without the weight of the canopy.  The struts also pulled the canopy forward a bit, closing that skin gap I had worked on over and over.  I tried to lift the canopy, but with it being pushed forward more the skin got caught on the front fuselage skin as it raised up.  I didn't want to try to take the struts off with them compressed, so instead I took the fuselage skin off so I could lift the canopy without fear of catching the skins on each other.  A common fix to the issue of the struts pulling the frame forward is to rivet a big block on the longeron behind the subpanel and then attach an adjustable screw to the front channel of the canopy frame that can rest against the block.  That way you can physically set the forward stop of the frame.  I'm not sure if that'll be necessary or not.  I'll figure it out once I get a little further in the process.


Having taken the fuselage skin off, I figured I may as well take the time to work on a few items on the punch list that were waiting for the skin to be removed.  The subpanel has 3 holes on each side that I couldn't get a rivet gun on (3 vertical rivets below).  A long time ago I had measured the thickness of the material and bought a few cherry max pop rivets to use in place of solid rivets.  These are structural rivets (steel vs aluminum) that you can use anywhere a solid rivet is indicated. They are ridiculously expensive too! 

One of the other things that I had completely forgotten about is dealing with two figure eight holes in the subpanel flange.  This happened when I was struggling with getting the skin to fit.  I ran out of steam today, but I'm going to have to fit a small doubler onto the flange.


Friday, September 27, 2024

Canopy Frame (3)

I finished up all of the canopy brace riveting (pop rivets to the forward channel of the frame).  Then I clecoed the roll bar channel to the side rails and drilled the #40 holes to #30 and riveted it all together.  To try to make a little more progress on the skin fit, I filed away more of the front edge of the skin and did some more minor bending to help with alignment.  It's better now but still catches on the fuselage skin, so more will have to be taken off.

Time to put the frame back on the plane to get ready for the canopy itself!

I also clecoed the rear top skin back on to help hold everything in place for when the canopy bubble is set on.


Thursday, September 26, 2024

Canopy Frame Skin Riveting (2)

I continued with the canopy skin riveting today.  I really like the Van's designs, but they really did miss the mark with this canopy.  As I've been told many times, by the time I was done riveting everything together, the shape of the frame had changed.  Now I have a couple of inches on each side where the skins pooch out from the side of the fuselage.  It was always that way to a certain extent, but now is very exaggerated after riveting.  Once the skin is riveted down and tight to the frame, it becomes very obvious where the frame itself is at fault.  The front corners on each side are pretty bad - the skins won't match up to the fuselage top skin.  Knowing what I know now, MAYBE I could have really beat the frame into submission way back before I even drilled any holes, but in the beginning it looked relatively close (at that point you just have to eyeball things).  The front outside corners of the frame are just manufactured poorly, and I don't think much could really have been done about it, outside of aggressively taking a grinder to them before riveting the two halves together.  It sounds like they've always been a problem, and it's not just my particular part.

So I've come to grips with the fact that my build is normal.  I was hoping for the luck of getting the 1/100 canopy frames that are manufactured wrong and are a great fit!  It's funny to look at the online forums and see everyone complain about the canopy, but then have one random person out of hundreds say they had no trouble at all and they don't understand what the fuss is about.  Either that person is supremely lucky, or maybe more likely, has very low standards.

So now that I've come to grips with the fact that I wasn't one of the lucky ones, I'm just moving on for now.  I'm not going to worry about the fit and finish until much later - probably after I've got all of the avionics installed and rivet the top fuselage skin.  That will change that shape slightly as well, so it seems silly to go through the trouble of trying to match the two skins when the target may move down the road.  One thing is for certain, I will learn all about correcting body work using fiberglass!  Some people say fiberglass doesn't stick to aluminum and will delaminate at some point, but a lot of people don't seem to have any trouble with it.  I guess I need to research which epoxies will work best on aluminum.

One part of the riveting that gave me fits was the triangle of 20 or 25 rivets on each side.  The frame has a lot of complex angles coming together there, and no matter what I tried, there was no perfect bucking bar.  Maybe it was just a bad day for me, but I think I smeared over one rivet for every one that looked good.  I also have some touch up paint to do someday.  I really don't like riveting after painting, but didn't have much of a choice here given how things go together.

I got through the aft rivets of the two side stiffeners as well.  All I need to do now is the center one, then pull the frame off again and put the pop rivets in the front tabs of the stiffeners.


Wednesday, September 25, 2024

Canopy Frame Skin Riveting & Pitot Mast

My wing skin was still on the bench from the other day, and since I need the bench space, I figured I should just finish the pitot mast mount. The mast is from Dynon and was designed for the RV7 wing, which apparently has different wing spar rivet spacing. That throws the "just follow the template" approach out the window.  The template assumes you can grab 4 rivets from the spar flange, which sets the base of the mast up against the rib (they provide a small piece of angle to attach it to the rib).  On the RV9, the spar rivets are spaced further apart, so I can only catch 3 of them.  In order to get 3, the mast has to be moved away from the rib, which means I have to fabricate a different way of connecting it.  Anyway, first things first - the template is correct otherwise, so I centered it over the spar rivet holes and laid out the other rivet hole locations as well as the centers of the circles that make up the fore and aft curves.  With that done, it was just a matter of cutting out the big hole for the mast to slide through.  I took the meat of it out with the Dremel cutoff wheel and cutting bit, then hand filed until I had a nice fit.

The base of the mast sets too far away from the rib for a piece of aluminum angle to tie them together.  I needed to extend the angle another inch, so I riveted a piece of thick aluminum to it from the scrap pile. I put the wing skin in place to pull the rib into position, then very awkwardly reached inside and held the angle in place while I marked the location.

I riveted the angle to the rib web.  I won't drill the face of it that gets riveted to the mast base until the skin is in place and riveted.  There's too much movement in the parts without the skin, so drilling holes now would for sure end up being off (the hole that's already in the part is just a hole that was in the scrap piece - I consider it weight savings).


The instructions say to move on to fitting the canopy bubble now, but I don't like the idea of the frame just being clecoed to the skin when I do that.  Not only can things move around, but the clecos sticking up would make scratching the canopy way too easy.  I looked through the plans and couldn't find a reason not to just rivet the skin on first, so that's what I'm going to do.  I started with the forward rivets.  Most of them went in fairly easily, but there are a couple where the rivets butt up against the hinge brackets.  I'm not sure I'll be able to get a bucking bar on those, so I may have to go with a few blind rivets there.  I didn't finish the outer edges of the front.  I have to think about what I might have for a bucking bar that will let me get into some of the tight spaces around the flanges of the side pieces.  I was a little worried about how the counter sunk pop rivets would work on the aft portion where the skin goes over the small tube, but it ended up working out fine.  You can see where instead of continuing the pop rivets to the outside, I just filled the holes in the skin.  These are the holes were the space in between the skin and the tube means there's nothing for the rivets to grab onto anyway.

I think I'm going to fight with the fit of the front skin gap for a while.  It still needs to be opened up a bit in the center - it catches the top fuselage skin and keeps the canopy from being able to open.  The skin doesn't lie even with the fuselage skin in all areas either.  This is a huge complaint of nearly every builder I've ever talked to.  It's mostly a problem on the curved portions, and really just on the left side.  I think with some gentle bending of the edge of the skin and maybe some scarfing of the edge I can get it close enough to be mostly  unnoticeable. I'm not going to mess with the final gap fit until the canopy is finished though.  Things just move around too much still.

Yesterday when I primed, I went ahead and shot some primer over the general area where the glare shield will be painted black.  I may have to redo it, but I had the primer in the gun, so why not.

Here's a shot of underneath.  You can see the filler I put on top of the outer portion of the tube to take up the space between it and the skin (it goes all of the way to the outside, but you can't see that).  You can also see the filler that I used to smooth out the long strip of aluminum epoxy I had done earlier.  After being primed and painted, I think it all ended up pretty decent. You can't see it in normal light, but with the camera flash you can see the small strip of cardboard that stuck to the top of the tube in the center after I had painted it and laid it out to dry.  I thought it was drier than it was.  I could have tried to sand it off (the carboard was stiff, not something I could soak in water and rub off) but I didn't want to destroy paint.


Tuesday, September 24, 2024

Canopy Frame Paint

I did some prep work yesterday to get ready for painting the canopy frame, but got lazy and didn't post an entry about it.  Since this was one of the last somewhat hidden areas of the build where learning errors could disappear, I decided to play around with some new products to see how they worked.  When I bought the wing kit, the guy also threw in a bunch of fiberglass material and various fillers for body work (aircraft specific, not bondo type stuff).  There are two different filler brands - essentially the same as a DIY epoxy/micro mix, but pre-made (for a premium).  I would never have bought these myself because of the cost, but since I have it and there is probably more than I can use, I figured I may as well mess with it to get an idea of when/how I'd possibly use it down the road when getting the plane ready for paint.

One area that has always bugged me is the huge gap that exists under the skin on the outside 1/3 of the canopy frame, just in front of where the panel sets.  Once I get the glare shield edging in place the gap will be less noticeable, but it's a perfect place to test the workability and strength of one of the fillers (Aeropoxy Light).  I mixed up a batch, which had a horrid ammonia smell that stuck around for hours, and put a pile of it on top of the frame's round tubing.  I put some packing tape covered in wax paste on the skin and clecoed the skin to the frame in an attempt to get a perfect fit.  Initially the stuff is fairly soft and easy to work into position, but it goes off pretty quickly, so within 5 minutes or so it became a little stiffer and harder to make smooth surfaces.  I'm admittedly using it for way more than it's intended for by building up a thick pile.  I think for just filling dings and dents, the workability will be fine.  I'm not convinced it'll end up working all that well, but no harm no foul if it doesn't.


After setting overnight, I took on the task of sanding down all of the filler this morning.  My previous "wedge" of aluminum epoxy that sets between the skin and the main frame on the sides was always kind of rough looking, so I also filled in that surface with the Aeropoxy.  The stuff is fairly easy to sand.  I wasn't looking for perfect transitions or anything.  I just wanted smooth enough to kind of disappear in the dark spaces when the canopy is opened up.  One lesson learned for later as I paint the exterior - minor imperfections in filler will be magnified 100x with primer/paint.  It's not a big deal at all for this particular area, but for exterior work, it's going to pay to make any body work perfect before shooting paint.  After a lot of sanding and "good enough" thoughts, I blew off all of the dust and wiped everything down with isopropyl alcohol to get ready for primer.  Even though the frame had been primed before, I needed to respray the filler as well as the many areas that I had sanded primer off of.


To test the difference of using Aeropoxy for a huge body shape like it's probably not intended for vs true body filler, I used it to fill a few holes in the top canopy skin.  Since I'm not putting rivets in the outer three holes that have the huge gap under the skin (the rivets wouldn't reach anything), I filled the holes.  They look grey vs the same orange color because I sanded them using sandpaper that I had used for other tasks.


Prepping for paint (well, interior paint where I don't care nearly as much about perfect shine) is always a little easier than prepping for primer.  I quickly scuffed the primer with scotch brite, then wiped everything down with alcohol.  I mixed up some Stewart Ekocrylic.  I decided to use this is an education on spraying.  It's one of my last painting sessions before the real deal of exterior paint.  Through my experimentation, I think I figured out how to control the paint to either get a smooth and very glossy surface or a glossy but textured surface.  I actually prefer the textured surface for the interior since I think it'll be less likely to show fingerprints.  Go figure, I like improperly sprayed paint the best.


It's hard to see in the pictures, but the filler seemed to accept the primer and paint okay.  I'll give it a few days to harden before I make a final verdict.


In between waiting for coats of paint to tack up for the next coat I worked on some miscellaneous tasks.  I riveted platenuts onto the access panel mounts in the remaining lower left wing skins and also started laying out the rivet pattern for the pitot mast mount.

Friday, September 20, 2024

Canopy Stiffeners

I'm inching my way towards having the canopy frame ready for paint and riveting (and then comes fitting the canopy itself).  Early kits just had the skin on the frame with nothing else, but somewhere along the way Van's developed a stiffener kit to try to improve how flimsy the whole setup was.  Fitting these stiffeners was a struggle, but even just clecoed on, it makes the frame much, much more solid.  It's still considered optional, but I don't know why anyone would skip it.

I had already bent the stiffeners and match drilled them to the front frame channel a while back.  The next step was to get them drilled to the skin.  I learned my lesson from doing too much fabrication with the frame off of the plane, so I wanted to drill the stiffeners to the skin with everything in place on the fuselage.  I figured that would help ensure that I didn't build any twist into the frame (since there are no holes in the skin, you could easily create twist without knowing it by the time you go from one end to the other).  After drilling all of the holes in the skin, except for the outside two tabs that go into the frame itself, I pulled the frame off so I could do the rest of the work on the bench.

The two outer tabs on each outside stiffener attach to the frame.  Van's says to just drill through the skin, then countersink the frame to accept the skin dimple.  Well, it turns out the skin already has a hole punched in it that would go through the inside tab right at the edge of the hole I already drilled in the tab (based on the instructions).  So their approach won't actually work.  I can't fault them though, considering this stiffener fix was an afterthought that was made to be able to be used on a number of models, like the RV6 that isn't pre-punched.  I decided to go backwards and instead of drilling a new hole in the skin, just drill the opposite direction and use the existing hole in the skin to make a new hole in the tab.  It creates two holes side by side on each inside tab, but shouldn't be a problem.  I prefer that to having two holes side by side in the skin where a crack would be more unsightly to deal with down the road.

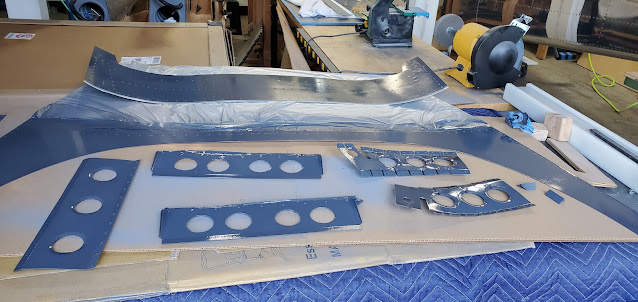
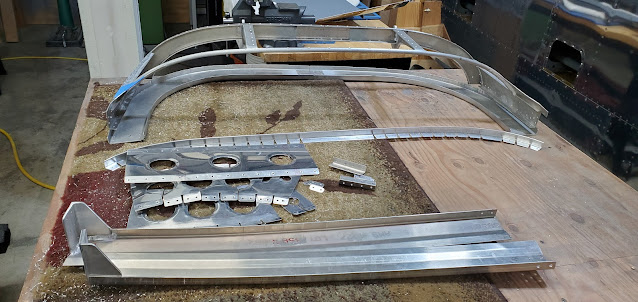
The last step for the stiffeners was to make some small tabs that will span the open gaps between the big holes and "set" the curve.  These will get riveted on the inside, but I match drilled them on the outside just for ease of access.  I didn't think those tabs would make much of a difference, but they really do lock the curve of the parts into place and make the assembly rock solid.


I didn't want to forget which way each tab went one (they are handmade, so a 1:1 fit), so I went ahead and riveted them onto the stiffeners.  All of this will get a coat of paint the next time I have a sunny, wind free day.


Last up for today were some random items, mostly dealing with things that won't work as designed and need slight tweaking.  I neglected to get pictures of a lot of it.  The first thing I did, which you can see by the two big holes below, was match drill the canopy hydraulic strut attachment I had previously made to the frame.  Van's provides a measurement, which surprise surprise, won't work.  If I followed their measurement, the attachment would sit right on top of a rivet coming through from the skin (the empty hole you can see in the frame to the right of the two big holes).  Hopefully moving the strut forward 1/8" won't cause any issues, because that's what I had to do out of necessity.  Lastly, there is an existing hole in the skin that lands right on the edge of one of the rivets in the frame brace.  So I drilled a new hole through the skin and into the brace.  I'll just have to fill the old hole in the skin as part of my fiberglass work on the canopy.


I dimpled all of the holes in the skin for the stiffeners and did some countersinking of the frame for a few holes.  With that, I think I'm ready to paint, rivet and start work on the canopy bubble itself!

Thursday, September 19, 2024

Canopy Frame Riveting

Time to rivet the frame together.  The instructions have you rivet it all together off the plane, which in hindsight wasn't the best idea.

The frame looked perfect sitting on the bench, but as soon as I put it in place, it became pretty obvious that everything had shifted.  Instead of the side rails being 1/8" up off the canopy deck, they were more than double that because of the angle created between the front frame and side rails when they were riveted together.  The biggest problem wasn't the gap itself, but what having a big gap does to the front of the frame where it meets the subpanel.  The extra gap meant that the front assembly was tilted up/forward relative to where it had been when I originally put it all together. That made everything bind and nothing line up.  The joys of the canopy!

I tried tweaking parts to get the rails to set down, but nothing worked.  In the end I drilled out all of the rivets on the side rail portion of the connecting brace, clamped the rails down to the canopy deck and re-riveted it again.  All it took was shifting the holes a very tiny amount (maybe 1/64").  With that, and riveting the upper ear of the front frame to the rail, I was able to get the gap back down to 1/8".


The good news is that the aft portion of the side rails that were originally not very well lined up with the curve of the fuselage have somehow miraculously gotten better.  The front joint between the two top skins is still less than ideal and will need additional work though.


Wednesday, September 18, 2024

Canopy Priming

The pile of canopy parts has grown enough that I needed to shoot a bunch of primer in order to move on.  I prepped everything and knocked out all of the canopy frame pieces, as well as a few other random parts that were sitting around until a primer day came (like the elevator control rod access covers that go in the very aft end of the fuselage).  The temperature was in the high 60's, so that was perfect for priming, but for some reason I had a terrible time getting good coverage without runs.  Most of these parts will get sanded before they get a coat of paint, so I'll be able to deal with the runs then.

It looks like I completely forgot to take pictures of fitting the canopy braces that stiffen the front portion of the frame by boxing in the skin and frame.  I'll take pictures of those when I drill them to the skins.


Monday, September 9, 2024

Canopy Rail Splice

The JB Weld was hardened, so I drilled the holes between the canopy rail angle and the rollbar.  The packing tape on the rollbar worked great and the JB Weld popped off of it and stuck to the angle.  I sanded it to the edges of the canopy rail angle.  Looks like it'll work perfectly.  The canopy rails are attached to the forward canopy frame with a splice plate.  It seems like an awfully flimsy solution, but I suppose it'll stiffen up once the actual canopy is in place.  I lined the rails up with the fuselage and clamped them in place.  The top forward portion of the rails had to be bent in and the shape changed a little to match up with the top ear coming off of the main frame and to give the plexi a consistent gap.  The gaps between the bottom side of the forward frame and the top fuselage canopy deck are inconsistent between the two sides, but there's not much that can be done about it.  The right side sets nice and even, but the left side has a slope to it because of how it's welded at the front edge.  Once again, another reason I'll probably need to work on my fiberglass skills to finish up the canopy and make it at least relatively even.

With the splice clamped in place, I match drilled it to the rails.  The top ears won't be drilled until later in the fit process.

I pulled the frame off of the fuselage for the next step.  I don't have a picture, but the bottom edge of the splice plate forms a wedge gap with the flange of the front frame.  That is what I made the tiny wedges of aluminum for a while back.  The rails get clamped together to the front to ensure the outside edges line up, then the wedge is slipped in and 4 holes are drilled up through the bottom flange.  The frame looks a lot bigger when it's off the plane!  It's also like a wet noodle.  With how flimsy it is, it's no mystery why every step seems to completely change the fit of the previous step.  Frustrating for sure. Up next is a bunch of prep work.  I need to countersink all of the holes and prime/paint everything to get it ready to be riveted together.


Sunday, September 8, 2024

Canopy Rail & Pitot

It took a couple of weeks, but I finally got my replacement canopy rail.  After having one poorly manufactured rail that was replaced, only to destroy the replacement trying to get the curve right, I admittedly held my breath a little as I was checking the fit on this one!  The curve is very close!  I think I'll still probably need to make a fiberglass skirt that creates a small overlap from the canopy skin and fuselage skin to tidy up the fit, but who knows (in the standard approach, the canopy skin butts up even to the fuselage skin along the entire length of the canopy - a very hard trick to pull off with the variability in fit of these canopy parts!).

The aft portion of the rail didn't fit nearly as well as the side curve.  It had an oddball angle to it that pulled the aft end in 1/4" from where it needed to be.  The canopy wouldn't fit over the rollbar if left that way, so a good chunk of my afternoon was spent massaging that aft end.  I was ultimately able to get it to set fairly flush with the outside edge of the rollbar.  The price I paid was that it caused the big aluminum end piece to set at a slight angle to the rollbar.  This happened on the last rail I had too, so I think there's either a slight angle to how my rollbar sets, or the jig Van's uses is different from right to left (the right side fit great).  I finally got the angle to set flush on the outer edge and only have a 1/8" gap on the inside edge.  I pulled everything apart and slathered a bunch of JB Weld onto the angle to fill the gap (I put packing tape on the rollbar so the JB Weld wouldn't glue the two pieces together).  These parts get riveted and bolted together, so the gap just needs to be filled with something solid to act as a shim.  Once the JB Weld sets, I'll match drill the rollbar to the angle and should be good to go.  


Since I have to wait a day for the JB Weld to set, I moved back over to the pitot.  The 3/16" aluminum AOA and pitot tubes have to connect to the 1/4" plastic lines that go to the instruments.  I flared the ends of the tubes and connected the flare fitting.  The pitot/static kit I bought also provided a metal fitting to connect to the flare fitting and step up to the 1/4" push on tube size.  I wasn't sure what to put on those threads.  I grabbed some Loctite 567 (basically a thread sealer/gasket kind of thing) and put just the tiniest bit on the first few threads.  I also had no idea of torque for these things, so "good n tight" it is.

Routing the plastic pitot/AOA lines to the pitot is another question mark I had to solve. I'm still not sure I've solved it, but gotta start somewhere!  The bellcrank is in the way of the lines going to the pitot, so somehow they have to be routed around or under the bellcrank.  Because the aluminum pitot lines will be in about the center of the wing (top to bottom), I am going to try to get the plastic lines somewhere in the center as well (meaning I may not even end up using the hole I put in the rib last week - the one I had to fix with the doubler).  I grabbed a piece of thin sheet scrap and made a brace to go under the bellcrank bolts and hold the pitot lines in place.


Here it is in place.  While I like it in general, I'm not quite sure it will keep the blue line away from the bellcrank.  I just centered the two snap bushing holes in the bracket but didn't think about the fact that the bellcrank isn't symmetrical.  The blue line is very close to the bellcrank when it rotates to the extreme inside position.  I won't know if it's an issue until I set up the ailerons and see what the actual amount of bellcrank movement is.


Just for kicks, I pulled the wiring for the lights through the conduit in both wings, labeled them and put the connector on for the position lights.  I labeled the wires with clear heat shrink over small labels I printed out.  It's not the quickest approach to cut out and slip tiny pieces of paper under the heat shrink, but it seems to work pretty well.  I'm sure I'll appreciate the effort down the road when troubleshooting electrical issues.


Wednesday, September 4, 2024

Pitot, Pitch Servo

I spent most of the day with a chainsaw, so didn't get a lot done on the plane.  I got my new tap (after breaking the other one), so drilled and tapped holes to attach the pitot to the mast.  The countersunk screws don't fit perfectly because of the curve of the mast, but a quick hit on the scotchbrite wheel rounded the heads just enough to make them fit the mast.  The pitot will have to come off while I fit the mast to the skin, so I'm sure I'll have to revisit the screws again before painting.


I don't have the autopilot servos themselves yet, but I do have the mounting hardware.  The pitch servo has an pushrod that gets attached to the elevator bellcrank.  I marked out the location for the pushrod and drilled through the bellcrank.


For now, I just bolted the forward end of the pushrod to the bellcrank.  The aft bearing will attach to the servo arm down the road.


Tuesday, September 3, 2024

Right Wing - Bottom Skin (5)

Finished up the right wing bottom skin!  The main spar rivets on the outboard skin were relatively easy to reach through the access panels and lightening holes.  The inboard spar rivets were another matter.  The inboard ribs (wing walk area) are very close together, and even though I could reach inside the lightening holes at the end of the wing, it was tough to get my hand at an angle to hold the bucking bar.  The wiring conduit across the entire wing added a little complication too.  I had to swap between a couple of different bucking bars to get at the rivets that are trapped between the conduit and the skin in a very small space.  In the end, doing the whole bottom skin solo wasn't nearly as bad as I had anticipated though. I actually think it is probably easier than doing it with someone else.  When bucking blind, the ability to get the feedback in the gun and bucking bar makes a huge difference.  I think only feeling one or the other would end up in a lot of under/over bucked rivets.

I got notice that the canopy side rail shipped today, so after I finished up with the wing I moved the workbenches back and cleaned up the shop.  I'll switch back to working on the canopy while I still have warm weather.  The frame will have to be primed and painted, and the canopy itself needs to be cut.  All of that is far easier with warm weather, so I'm going to attempt to get it done in the next few weeks.  I don't need to get the canopy fiberglass done, just the overall fit and attachment to the frame.  I need to order some Sika adhesive.  I've decided to go the route of gluing the canopy onto the frame vs drilling the plexi and screwing it on.  This was a crazy idea 25 years ago, but in that time it's become a fairly standard approach and gets rid of one more reason for a canopy to crack over time due to 100 holes drilled into it.


Monday, September 2, 2024

Right Wing - Bottom Skin (4)

Another day, a few more wing rivets.  I got the outboard skin done and most of the inboard skin.  I mostly have the spar rivets left to do.