I've been dragging my feet on starting the riveting of the bottom skins of the left wing. The reason? The wing was facing the wrong way, making the light bad and access difficult with vehicles in the garage. Maybe not the best excuse, but that's the excuse I had. I didn't actually start any riveting today, but I did take the time to move benches and everything else so I could swing the wing cradle around. I spun it so the left wing is now facing my benches and tools. Now I have something to do when I need a break from other tasks.
I'm slowly working my way forward with wiring cleanup. While I think I have all of the wiring pulled that I need, it also won't surprise me if I find out later that I'm missing something. That will just allow me to continue my ritual of cutting off at least two zip ties for every one I put on.
I glued a cable mount inside the flap motor housing and ran the flap motor power and position sensor wires down the housing and into the center tunnel.
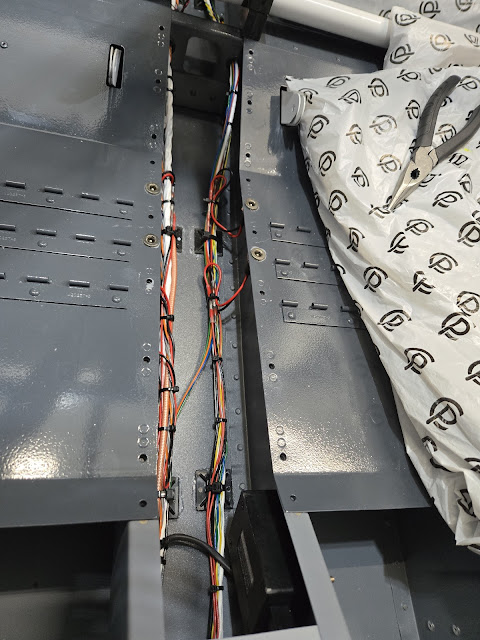
There are a number of wiring offshoots in the center tunnel between the seats (to get to the seat heater jacks and roll trim servo), but it still cleaned up fairly well.
After I got most of the center tunnel wiring done, I reinstalled the roll trim servo. I also slid the elevator pushrod back into the tunnel. It's just laying on the floor for now, so it won't be as close to all of the wiring as it looks in the picture. I need to measure the pushrod again, which is going to take some doing. The manual shows the length it should be, but you can't actually install it with the end bearings in place. So I had to unscrew the bearings to get it in place. It's not possible to get a tape measure on it, so I'll have to go with a string or something.
I've decided to take certain wires out of the terminal blocks and instead just use butt splices when I'm ready to connect the wings. Most power circuit wires are fine in the terminal blocks, but low voltage data wires are apparently more sensitive to loss, and the terminal blocks can sometimes cause enough noise in the signals to be problematic. On the left wing, there is only one questionable wire - the pitot heat status, so I pulled that out of the terminal block. I also took the screws out of the block and added star lock washers to them.
The right wing has more data wires because of the autopilot servo. In hindsight, it would have been easier to just use a connector of some sort vs the terminal block, but next time I guess.
I originally thought I would just run the antenna coax through the large lightening hole in the seat rib (like the above photo), but I couldn't figure out a great way to secure it. I could put some edging on the hole to protect the wire from rubbing, but the coax would still be unsecured and vibrate. I decided to punch through the rib with another hole. I did this on both left and right sides. Not shown in the pics, I also glued down a number of additional cable mounts to secure the corrugated tubing.


