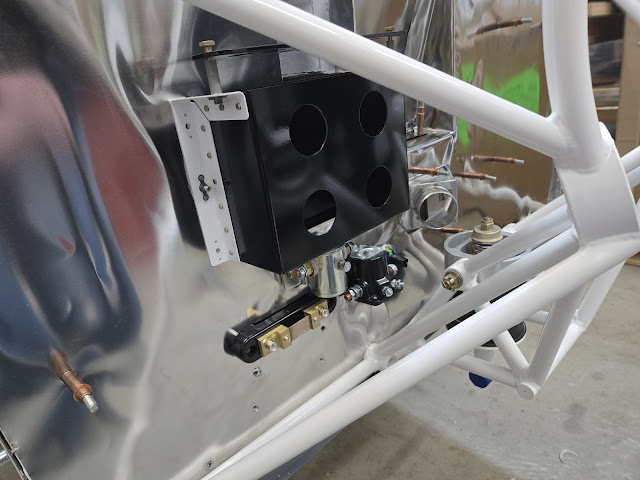
I trimmed a few areas of the firewall insulation and foil to ensure that nothing would be pinched underneath the engine mount points. Back when I had test fit the mount and drilled all of the firewall holes, I noticed that the lower outer mounting points were not in the same plane as the rest of them. That's apparently not all that uncommon. To take up that gap, we placed a 1/16" thick washer under each lower outer mount point. With those in place, we put the bolts in and torqued everything down.
I don't have a picture of it specifically, but before we put the mount on, we installed a number of the firewall items, as well as cut the fiberfrax and foil for the recess.
The battery, solenoids, shunt, etc are mounted on top of the insulation, so they do their part in holding it all in place. The fiberfrax compresses pretty well, so even though it starts out soft, you can still crank down the nuts and screws fairly solidly. I still need to buy a few longer screws for the fuse holders, so those aren't in place yet.
After the mount was on, we chained it to the engine hoist and lifted the plane off of the rolling cart that has supported it up to this point. All three gear went on relatively easily. I put a light coat of grease inside the main gear tower, just as a protection against corrosion. I've gotten so used to seeing the plane sitting close to the ground that it really seems tall now that it has legs!
Next up, the engine! It was a bit of a struggle just to get the engine and hoist close enough together. We tipped the crate up and slide the hoist underneath, which got us close enough that we could then lift the engine and swing it all underneath the lift. We eyeballed the chains and got it set to what we thought would be a level position. If we had it to do over again, I would have actually tilted it back a tiny bit to help with alignment, but it worked okay as-is.
The install wasn't easy, but it also wasn't hard. It's just very sensitive to the slightest off angle. We started by putting in the lower bolts and tightening them up completely. Then we let the engine sag under it's own weight (plus the weight of both of us pulling it down), which opened up the top mounting points enough to slip in the top donuts. The top two bolts took a bit of wiggling to get in place. With the gear and engine on, she's beautiful!
I discovered one gotcha with the engine install - the Titan comes with a 90 degree oil filter attachment, which allows the filter to more easily be accessed. Unfortunately, the attachment put the filter right under one of the mount arms. It was so tight that before I noticed it, we had crushed a small corner of the filter. I shot off a couple of emails to other builders who I know have Titans, and they all said it worked fine for them. After one sent me a picture, it was obvious that there is a big spacer that can be inserted on the attachment that pushes the filter a few inches aft. I sent an email to Continental asking about it, and they responded with an apology, saying they must have forgotten to install the spacer. I'm guessing they don't always put it on the engines, and they may just not have tracked the fact that this engine was intended for an RV9A, which obviously needs it. They were great about it though, and said they'd ship me the part right away.


