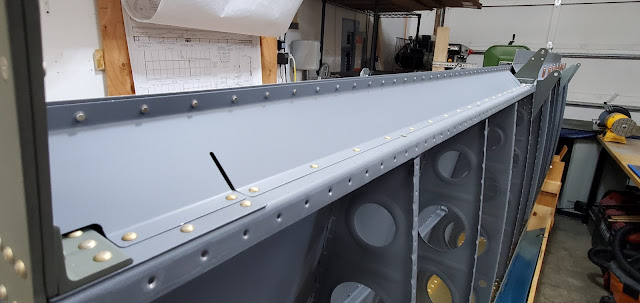
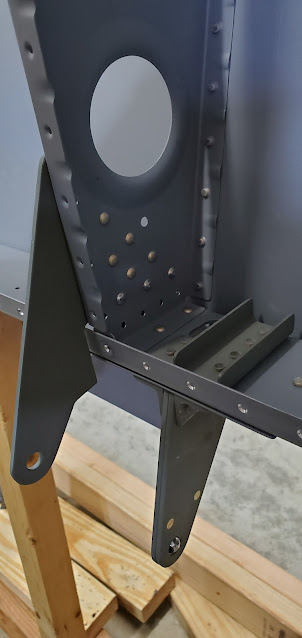
I clecoed the leading edge to the right wing today. Before doing that, I upsized the hole that is predrilled in the bottom side of the skin for the tiedown location. After doing that and mounting the leading edge, I realized that apparently the predrilled hole was off. The hole I had drilled with the unibit was off-center by a significant amount. It's an irritation for sure, but thankfully I was able to make the hole line up to the tiedown bracket well enough by increasing the diameter by about 1/16".
Thursday, July 28, 2022
Right Wing & Aileron Prep
Wednesday, July 27, 2022
Right Wing - Rear Spar Redo
I picked up the replacement rear wing spar last weekend, and today I got everything redone and swapped back onto the right wing. It's amazing how much easier it is the second time around, mostly because I didn't have to spend hours scratching my head trying to figure something out on the plans (it helps having a completed wing to reference too). Instead of going step by step through the instructions, this time around I took a number of liberties in the order I did things based on some lessons learned while finishing up the left wing.
First step was getting all of the holes final sized and match drilled where appropriate, then preparing everything for primer. Priming only took a few minutes since it was 90 degrees outside and the primer dried pretty much instantaneously. I went ahead and dimpled all of the rear spar flanges before I assembled anything. Far easier than doing it when it's on the wing stand.
Wednesday, July 20, 2022
Ailerons
The shop is a bit of a mess at the moment. I moved the left wing off of the stands and onto the storage cart, and moved the right wing spar to the workbench. Yesterday I drilled out the rear spar/rib rivets on the right wing in preparation for getting the new rear spar this weekend. Removing the old spar was a non-event and didn't take long at all. As soon as I have the new rear spar riveted onto the right wing, I'll get the wing mounted on the stands so I have my table space back.
I started on the ailerons today. I decided to build both the right and left at the same time just for efficiency. I still need to go to the store and get some thick MDF to create a super flat surface to build the ailerons and flaps, but it was nice to get rolling on something different than plain old ribs and skins for a while. First I put the end ribs (that attach to the counterbalance tube) and doublers in place on each end of the spar and match drilled them.
Sunday, July 17, 2022
Left Wing - Aileron & Flap Gap Fairings (3)
I finished up the left wing aileron and flap gap fairings today. I deburred, dimpled, and scuffed the parts (for both wings) and primed them. This was the first time I'd sprayed the normal primer in a while, so I had to play around with the gun settings for a while to get things dialed in. I have enough primer left to finish up the wings, but I'll have to order more for the fuselage. That means I need to decide if I want to move to an epoxy based primer for the cockpit, or if I'll just stick with the same primer and paint the cockpit instead. From what I've gathered over the years, the epoxy primers are tough enough on their own for high wear areas (especially since I'll be putting interior panels and carpet in), but the standard primer would probably get pretty beat up without a harder paint finish.
Saturday, July 16, 2022
Left Wing - Aileron & Flap Gap Fairing (2)
I wanted to be able to work on the ailerons and flaps without having to crawl around on my knees, so I flipped the left wing over and moved it over to the rolling cart. This is where it'll live for a few years until I'm ready to rivet on the bottom skins.
Friday, July 15, 2022
Left Wing - Aileron & Flap Gap Fairing
Today I received the shorter offset rivet set (for universal heads) that I ordered. I needed this in order to buck many of the rivets in the flap bracket assembly. The longer set that I had was long enough that the rivet gun wouldn't fit in the rib bays. I'm not a huge fan of the offset sets because they tend to spin in the gun and are harder to control, but sometimes there just isn't much of a choice. It didn't take long to get all of the flap brackets and attach angles finished up.
Sunday, July 10, 2022
Left Wing - Flap Brackets (2)
Each flap bracket (3 per wing) gets two attach angles - one that rivets to the rear spar and bracket and one that is primarily riveted to the skin and bracket. For the first angle, it was a simple matter of clamping them in place and match drilling through the holes in the rear spar. Then the same is done drilling through the holes in the bracket.
Saturday, July 9, 2022
Left Wing - Flap Brackets
I'm finally moving on from playing in proseal! I have to say, while I'm no longer afraid of working with the stuff, I'm definitely glad to move on to some other types of build again. The brackets that attach the flaps have a little minor fabrication to be done of some aluminum angle. Van's doesn't label the angle stock, so I had to dig around in the crate to figure out which pieces to use. A few of the pieces are pre-cut to length because they also have a bend that the factory puts in one edge (to clear the wing's rear spar flange). The others are cut from a long piece of angle. I cleaned everything up and deburred the edges.
Friday, July 8, 2022
Right Fuel Tank - Fixing a Leak
A couple of days ago I leak tested the right fuel tank. Everything looked good except for one small area at the outboard top corner where the baffle and outboard rib meet. These corners are notorious for having leaks because of how they have to be put together (put a huge blob of proseal sticking up in the corner and hope it smooshes down just right in all of the right places when the baffle is pressed down - there are actual gaps it has to fill, whereas in all other areas it's sealing two tight surfaces together).
Sunday, July 3, 2022
Right Fuel Tank - Finished!
Calling the fuel tank "finished" before it's leak tested might be jumping the gun a bit, buy I'm optimistic. Today was a long day, but once you start closing things up, there aren't a ton of great stopping points. All in all, it went pretty well. I modified a few processes from the first tank, did better at some things, and created new mistakes with some things.
One lesson from today is that when there is something that needs to be done, I need to mark it in a very obvious way, otherwise I just forget all about it. Case in point, in my final inspection of the internals of the tank, I decided there were two small areas at the front of two ribs that I wanted a little more proseal on. Because I hadn't mixed up the proseal yet, I didn't have any handy to just dab on at the moment. Fast forward a while and as I started riveting on the baffle, I remembered. Too late. I think it's probably okay because I was just going to add more out of an abundance of caution, but I won't know for sure until I leak test everything.
One thing that got me on the first tank as well as the second tank was the fit of the baffle. I don't know what the deal was, but on both tanks, the lower side skin was skewed by maybe 1/64", so the holes for the baffle/skin joint were slightly off. The baffle went together with clecos just fine, so I didn't notice the issue until I started putting rivets in (they wouldn't go in). I'm still not sure what happened, especially since the exact same thing happened on both tanks. I had to hit each hole with a reamer to just knock a little bit off of the hole. Even with that, the rivets wouldn't sit perfectly flat (because the skin in that area is countersunk, not dimpled - the dimples would have had a lot more forgiveness). They are just slightly at an angle - just enough to be able to catch a fingernail on one edge of the manufactured head. The top skin is perfect, so I'm not losing much sleep over it. It won't be noticeable for anyone who isn't out to find errors and crawling around under the wing! It was just a bit strange to have this happen on both tanks.


