I got all of the overlapping seams of the stainless foil taped with aluminum tape. The tape wouldn't stick to the areas that had fire sealant, so I had to cut around those areas. I'll keep an eye on those spots over time to make sure they don't lift up, but I doubt they will. The tape sticks extremely well on everything else, so I don't think it's going to budge.
My method for the wire penetrations is to have a split piece of firewall sleeve rolled and inserted into the metal tube, then a second portion of sleeve slipped over it all and clamped to the penetration tube. A second clamp will be used to clamp the inner and outer material together after the wires are inserted. I'll have to put some RTV or sealant over the fiber ends to keep them sealed. I've seen people wrap silicone tape over the wire bundle and then over the end of the fire sleeve to make it gas tight as well. That's on top of pumping a little fire sealant into the inside around the wire bundle. I'll choose my method after I see how big the wire bundles end up being.


The manifold used for the fuel and oil pressure sensors had 3 ports on it, but since my manifold pressure sensor is a different type and aft of the firewall, I decided to cut off the third port. If I ever need a 3rd port, I can always buy a new manifold and replace this one. I can't think of what else I'd need it for though. The reason I chopped off the third port is because it made it nearly impossible to get at a few rivets on the top firewall flange. I inserted the fuel and oil pressure line fittings, put plugs on the unused sides of the manifold, then inserted the sensors. I made sure to use Loctite thread sealer on all of these fittings.

I haven't seen it in the instructions anywhere, but I know the master and starter relays need diodes to keep them from wearing out. Van's is apparently saving money on wire with these diodes - they made the starter relay diode about as short as it possibly can be and still fit. Even just 1/4" longer would have made a big difference in getting it put in place.
The brake fluid reservoir was next. It was an easy fit, although I did end up taking it off and redoing it to add a couple of washers under the mount and make it stand further off the firewall. Without the washers as spacers, the top part of the reservoir hit the firewall (the firewall has a bend and angles forward right about where the reservoir mounts).
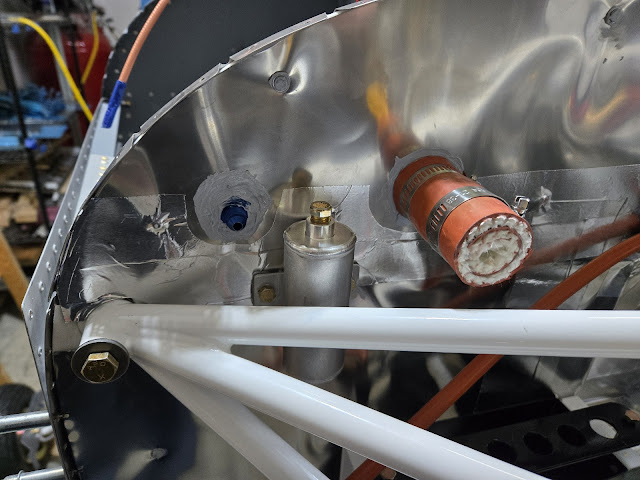
I attached the sensor end of the oil pressure hose (the orange hose going horizontally across the firewall) and used two adel clamps to attach it to the firewall. These premade hoses are really nice - the fire sleeve isn't the big, bulky sleeve that is often used. It fits incredibly well and is a much cleaner installation. I still haven't quite figured out where the oil pressure port is on the Titan. I've been digging around online trying to find a diagram, but no luck so far. Continental sent me basic operation instructions, but they are way behind Lycoming in terms of having documentation for the engine. I suppose it's because they bought the company and it wasn't their own engine design. I'll figure it out. I just have to do more legwork to find the information.

Last up for today, I decided to start tackling the exhaust since it's one of the bigger pieces that everything else kind of has to fit around. The learning curve forced me to do it all twice of course. On my first attempt, I bolted the gaskets and first sections of the exhaust on all four cylinders. I did it that way because the instructions made it sound like that was the right way. Nope. Only after all of that was torqued and done did I realize that there was no way to fit in the crossover tubes that connect the two opposing cylinder exhausts together. It will all only fit if it's assembled loose, then the entire section is bolted to each exhaust port at the same time.
Everything but the last section of the tailpipes are in place. The tailpipes are a little more involved because they have to be supported, yet still be able to move. I'll tackle that on another day.


