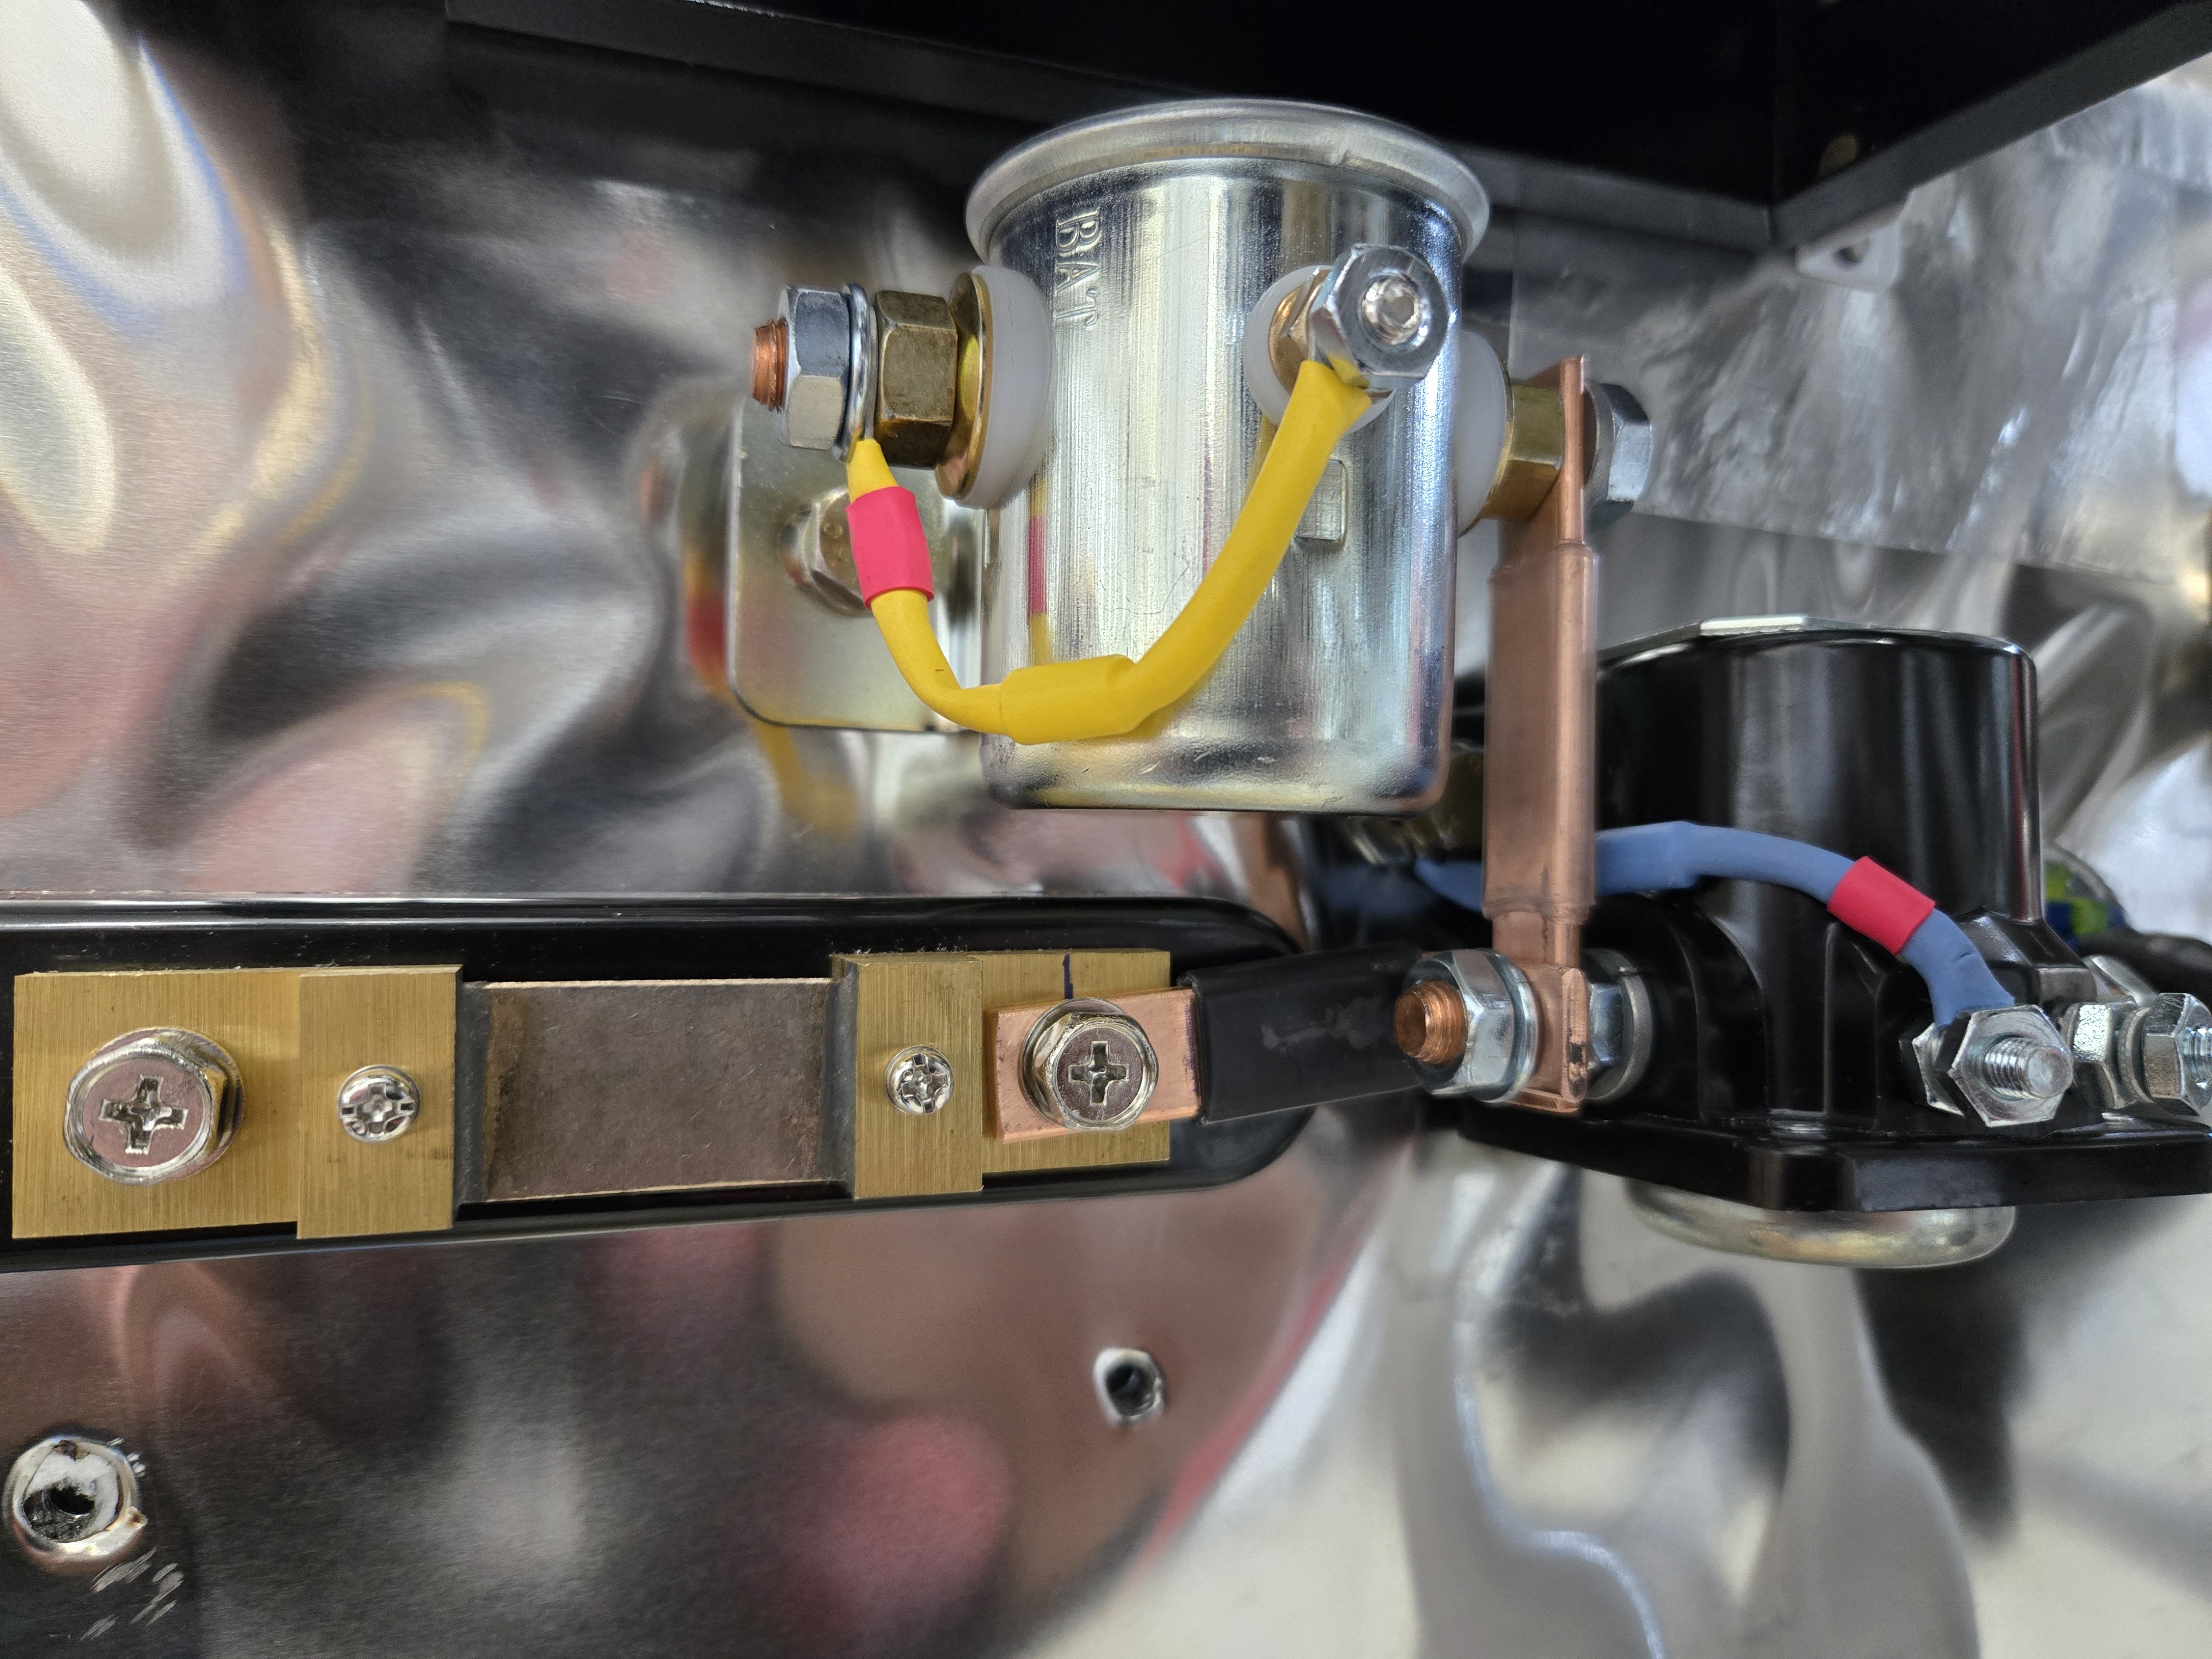
I did a little more work on the electrical portion of the FWF. I ordered some 1/8" copper bar and split it to about 1/2" wide chunks to make the connections between the solenoids and other power related bits and pieces. The starter solenoid to amp shunt took a little zig zagging and step offsets to fit. Yet another lesson in airplane building - if you have the room, go ahead and spread things out. I tried to keep everything fairly close together because I wanted to leave room around the engine mount, but I probably should have given myself a little more space.
I put a couple of layers of heat shrink over the middle of each bar, just to give a little protection from accidental arcs (although I don't actually think these will be carrying a load anytime I'm actually working near them). Next up, I'll have to install the two fuses and run bars to each of them from the other side of the shunt. I may have to use a heavy gauge wire for the bottom fuse holder. It'll just depend if I can bend the bar enough to get over/around the top fuse holder.
The oil pressure line travels across the firewall and connects to a port just above the right PMag. Unfortunately, when they put the hex head plug into the port, they rounded off the hex enough that getting it out turned into an hour long ordeal. I was sweating bullets - the last thing I wanted was to strip the hex head even more and then have to suffer through using a bolt extractor on it. It didn't help that they had thread sealant on it of course, so it was stuck stuck. I eventually laid some scrap fiberfrax over the PMag and hit the case around the plug with the highest setting on my heat gun. Once I got it nice and toasty the plug finally came loose! The only thing I don't like about the location of this port is that it puts the oil pressure line really close to the wires going into the PMag. I will have to keep an eye on it. I may end up taking the 45 degree fitting out and redoing it so it exits a little more horizontally vs diving down towards the PMag.

I decided I should probably go ahead and add on the oil filter adapter spacer before things get too tight behind the engine. This was pretty straight forward, minus one of the bolts that was difficult to get out because of access - I cut off a 7/16" wrench to make a stubby version that was about 2" long. That gave me just enough room to work on the bolt and turn it little by little. The spacer pushes the filter back far enough that it's now going to be super easy to get at it during oil changes. Definitely a worthwhile modification.


