Sunday, October 30, 2022

Bulkhead Assembly & Longerons

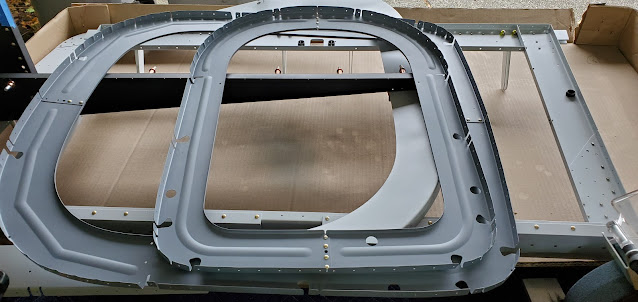
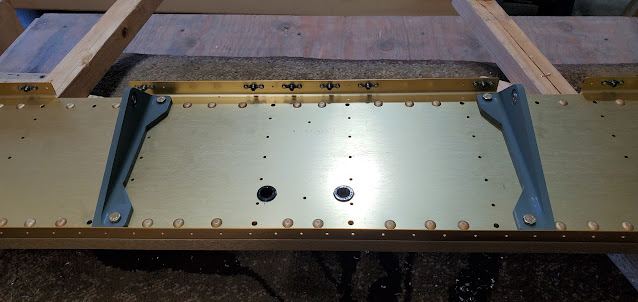
There really isn't much to do to get the bulkheads ready to install in the tailcone.  I started by riveting the angle onto the F-710, then the attach bars to F-711.  The horizontal angle piece for 711 doesn't get riveted until the side skins have been riveted on.


The 712 bulkheads got riveted together.  The tie down bar will be attached here, but doesn't get riveted on until later on when the tail is ready to install.


I still can't get over how flimsy the bulkheads are.  There isn't much to them!


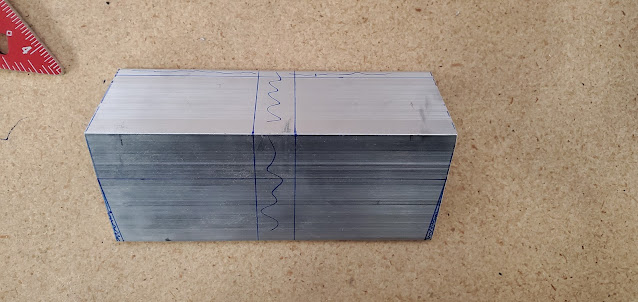
The longerons were up next.  I measured and measured and measured, then cut them to length - almost 14 1/2' long!  The longerons get bent, curved, and twisted to create/match the fuselage shape, but first the aft ends had to be cut in a couple of places.  The very aft end got an angled piece cut out, then further up the longeron a slot was cut out to allow the attach bars from the 711 bulkhead to slide through (to attach to the vertical stabilizer).


I think that brings me to the bending and twisting portion of prepping the longerons.  Van's gives instructions for how to do it, but from reading online it sounds like there are better options (Van's just says put them in the vice and whack with a hammer).  Everybody says that bending the longerons is nerve wracking, but ends up not being all that bad.  We'll see!

Saturday, October 29, 2022

Bulkhead Priming

There was another surprising break in the rain and the temp was above 50, so I jumped at the chance to get all of the bulkhead parts scuffed, cleaned and primed.  I went back to the Ekoprime.  After using the epoxy primer and rattle can stuff recently, the Ekoprime sure was nice to use. 


Thursday, October 27, 2022

F-711 Bulkhead

Just a few minutes in the garage today - I laid out the cuts on the bars of the 711 bulkhead and got them cut, deburred, and the last few holes drilled.  I also cut and shaped the piece of angle that attaches horizontally (will later attach to the aft deck).


Wednesday, October 26, 2022

F-706 Bulkhead, Rear Bulkheads

It's getting hard to name these posts without just listing the parts, since everything seems to be a "bulkhead" now.  I riveted the 706 bulkhead together as much as I could.  A few of the parts remain just clecoed until later on when other parts come into play.  The verdict is in on the spray can primer in cold weather:  it's awful.  It's probably not fair since I'm sure it'll be much harder in a few weeks, but at least as of today, it was still incredibly soft.  My hands were black after handling the parts for riveting.  So I will use that stuff sparingly and go back to the Ekoprime and Ekopoxy for most stuff.

For the rib that extends back from the baggage bulkhead (on the floor), I left out a few rivets to the angle stiffener.  If I go with the Dynon system for an autopilot, from what I can tell the taped holes are where the mounting bracket for the pitch servo will get attached.  So I'm leaving them out just in case versus having to drill them out later.


Just a few rivets and the whole 706 bulkhead was assembled.  Knowing which holes to leave empty for the time being is a real exercise in attention to detail.


Next up was to move rearward to the next couple of bulkheads.  These are relatively straight forward.  Each bulkhead gets holes drilled for rudder cables, wiring and static line routing.  These bulkheads were quite warped, so I had to do some fluting as well.  The 709 (half circle shaped one) was incredibly warped.  I don't know if I got the holes lined up well enough or not.  I won't really know until I see how it fits the skin.


The 710 bulkhead has a piece of angle across the top that eventually attaches to the aft deck.  I cut that to length and match drilled it.


The 711 bulkhead gets two bars that will stick up through the aft deck and attach to the horizontal stabilizer.  The plans call out the length of these bars, but I'm tired of getting burned by the measurements in the plans.  Far too often the plans indicate a ridiculous specific length (down to a 1/32") that ends up being just a hair too short.  That boggles my mind, because there is usually plenty of space to buffer by adding an extra 1/16-1/8" or something onto the material to ensure proper rivet edge distance and clearance.  I've had to remake parts that were the exact size indicated by the plans, but still too short for comfort.  So for these bars, I decided just to cut the stock in half for now.  I'll drill and fit the bars, then cut them once I'm sure all of my rivet distances are fine.


Tuesday, October 25, 2022

F-705 / F-706 Bulkhead Assembly

I assembled the 705 seatback bulkhead.  It's only been two days since I primed the parts, and given the cooler temperatures, I don't think the primer is fully cured yet.  It's hard enough, but it's still definitely not as hard as it is on the skins that I primed a week or so ago.  I've found this to be the case with just about every type of primer I've tried so far though - they are good enough to work with after a day or two, but they get tougher and tougher as the weeks go by.  The Ekopoxy ended up okay on these parts, but it got beat up just enough while riveting (and dirty because of the light color) that I think it convinced me that I'll have to shoot some paint on the interior after all.  I don't think I'll do the entire interior like some people do though.  I'll just selectively paint the portions that will be visible after the interior is in, which won't be much.  The Ekopoxy will be plenty tough for everything else.

The first portion of the bulkhead assembled was the horizontal seat support.


You really have to pay close attention to the plans for this bulkhead.  There are a lot of notes and callouts for riveting that could be easy to miss.  Some of the holes don't get rivets at all for the tip-up canopy version and others don't get rivets until later in the build process.  I taped off holes in the vertical members to keep me from accidentally putting rivets in them.  Hopefully I got them all.  The big piece of angle (the one with the slot for the canopy latch) also only gets clecoed in at this point.  It'll get riveted in after the skins are riveted on.  I think it's in that order simply because the skin rivets would be very difficult to get in with the angle already riveted on.


Once the main structure was done, I moved on to the big bar and doublers at the bottom.  The last thing to do was to bolt/torque the seat belt anchors on.  There is a spacer that gets bolted between the doubler and the bar, but I just bagged the spacer and hardware up and taped it to the bulkhead for now.  The instructions say to put it in, but that doesn't make any sense since the bolt also has to go through a seat rib at some point.


I didn't feel like pulling out my spray gun to spray the handful of parts I need to put the 706 bulkhead (behind the baggage compartment) together.  I tried a new Rustoleum primer.  The spray can primers I've used before have been self etching, but I'm very unimpressed by them.  From what I gather, the self etching versions tend to have fewer solids in them, so they don't lay on very well and are pretty fragile for quite a while.  I think they probably get much tougher in the weeks/months they are on, but I want something that is at least strong enough to work with after a day or so.  So this new primer is just the normal non-etching primer.  I thought it was light gray, but turns out it's almost black.  I'm going to have quite the spectrum of primer colors in the plane.

I sprayed the parts and snuck a hair dryer out of the house to make it flash off faster.  I should probably just grab a cheap heat gun the next time I'm at Harbor Freight.  This primer definitely goes on thicker than the self-etch (and is a lot cheaper).  That being said, I think I'll just stick with it for very small one-off parts and go through the trouble of pulling out my spray gun and using Ekoprime most of the time.  The Rustoleum spray can nozzle doesn't atomize the paint very well, so it goes on super heavy in a very small area, and at the same time has a ton of overspray.  Just doing these few parts took up well over a half of a can because of the overspray, which is pretty ridiculous.  It was a good reminder though - HVLP guns really are pretty efficient.  I dislike having to mix up the Ekopoxy, and the cleanup is harder because it can set up on parts of the gun, but I've become a big fan of the Ekoprime after trying more and more primers.  It's just super easy to work with and clean up.  Just for kicks, I found a scrap piece that had the Ekoprime on it from probably 6 months ago.  It is very tough.  I couldn't scratch through it with an awl without really digging in.


Even though the primer will be soft for at least a week in these temperatures, I wanted to move on with the build.  I was ready to rivet, but realized I had forgotten to cut half holes out of the edges of one of the doubler pieces to allow a snap bushing (the full hole is in the 706 bulkhead).  So I clecoed it onto the bulkhead, traced the holes onto the part and drilled/filed the holes.  When I was 3/4 done, I realized I had flipped the part when tracing the holes, and it's not symmetrical.  Chalk up another oops.  Instead of ordering a new part, I rummaged through some of my scrap sheet metal and found a piece of the same thickness.  It didn't take long to remake the part and get it primed.  So that's where I'll pick up tomorrow.


Sunday, October 23, 2022

F-705 / F-706 Bulkheads & Priming

The last task to complete for the F-705 bulkhead (seatback support) was to drill the holes in the big pieces of angle that sit on the top outside corners of the bulkhead.  These also have a slot cut in them for the canopy latch.


The slots ended up being more of a pain than I would have thought.  I drilled two holes for each end, but then of course had to somehow get rid of the material left between the holes.  The small files I have proved to be almost useless because they have super fine teeth and polished more than removed material.  But since that's all I had (or so I thought), I settled in for the long haul. The slots sure are ugly, but it was as good as I could do given the tools.  When I was done, it dawned on me - two days ago I had sharpened my chainsaw!  The chainsaw file would have worked perfectly and probably resulted in a much prettier product.  Oh well.


I was a little worried about the egg/tilted shape of the slots relative to what they are supposed to be, but another builder sent me this picture and assured me the shape of the hole really doesn't matter much.  He said the hole in the angle (the angle is behind 3 other pieces of sheet that have a pre-punched slot) is purely there to allow clearance for the tip of the canopy latching pin when the canopy is closed. 


Next up was starting on the F-706 bulkhead, which is the bulkhead at the back of the baggage compartment.  It's going to be interesting to see how all of this stiffens up when it's put together.  The bulkhead material is incredibly thin and wobbly.


Three pieces of angle and two ribs attach to the back of the bulkhead.  They support the elevator bellcrank.


I was getting antsy to prime before the sun went away, so I neglected to take any pictures of the 706 put together.  I scuffed and cleaned up the 705 and 706 bulkhead parts and primed them with the Ekopoxy primer.  The sun disappeared as soon as I started though, and the temperature dropped to about 50.  It probably isn't fair to judge this primer when the temperature is 20 degrees cooler than it's supposed to be, but I'm really not liking it.  The non-epoxy Ekoprime lays down so much nicer.  The Ekopoxy is just hard to get a good finish with.  I was really hoping I could get away with just the Ekopoxy for a final coat in the cockpit, but now I'm not so sure.  I may have to rough it up down the road and spray some actual paint.  I would only have to do a very small number of areas though.  Most will be covered by panels and carpet.  I'll see what it looks like tomorrow.


Thursday, October 20, 2022

F-705 Bulkhead Parts

I can definitely say that building the fuselage is less tedious than most of the other build I've done up to this point.  There are far fewer completed parts to just drill and rivet together, that's for sure.  I enjoy the fabrication of parts, so even though it takes time, I'm enjoying the fuselage build so far.  The next pieces to create are a couple of large angles that go along the top of the 705 bulkhead.


I still haven't figured out the rationale behind which holes Van's punches and which they leave to the builder, but here again are two missing holes for snap bushings that have to be located and drilled.


The top portion of the bulkhead supports the seat backs.  In order to provide some degree of seating flexibility, the top horizontal portion of the bulkhead gets a stack of a few different sizes and shapes of parts that will ultimately provide a catch for a piece of hinged material on the seat back (allowing the seat back to be moved along with the bottom seat cushion to maintain the same vertical angle of the seat back regardless of fore/aft position of the seat bottom).  From what I've read, it's of questionable utility, but it's easier to just put it in place now and never use it than put it in place down the road.

There are three pieces to it all: a shim, a larger piece of aluminum sheet, and a piece of aluminum angle.  The sheet gets bent just a slight amount (4 degrees).


The shim that goes underneath the sheet is just a blank, so all of the holes have to be laid out and drilled through both parts.


The last portion is the aluminum angle that sits on the rear side of the upper horizontal member of the bulkhead.  Lots of clamps (and spacers - the rear portion is offset 1/8" from the bulkhead, which just happens to be the width of two popsicle sticks) and holes were located and drilled in this piece to match the bulkhead.

Maybe this picture will explain better how this all works and goes together.  The shim raises the sheet above the bulkhead, and the sheet bend and height of the piece of angle provide the same offset on the rear side.  The seat backs will have a piece of aluminum sheet attached to the via a hinge. The seat back can either just rest up against the bulkhead itself, or the hinged sheet can be raised up and captured in one of the two locations created by the stacked parts.  That allows the seat back to have a little fore/aft angle movement.


The instructions got very sparse after this.  It may as well just say "figure out how to put everything else together."  The instructions say to rivet it all together, but they completely forgot to call out some of the other parts of the bulkhead that have to be attached and drilled.  You really have to pay attention to the plans themselves to keep from getting bitten!  Tomorrow I'll finish up the rest of the pieces the instructions are silent on, then prep for primer.

Wednesday, October 19, 2022

Seat Belt Anchors

The 4 seat belt anchors (8 pieces) bolt to the front of the 705 bulkhead.  For some reason Van's chose not to drill the bolt holes in them, so that's my small task for today.  The idea is to drill one anchor of each pair, then use that to get the second one lined up for drilling.  I marked out the hole locations on all of the left side anchors and drilled the first set of holes.


After one side of each pair was done, they were temporarily bolted to the bulkhead and a 3/16" shim was put in place to locate the other anchor.  These holes were drilled using the bulkhead holes as guides.


Four of the anchors had to be trimmed by varying amounts to allow the seat ribs to clear them.


Monday, October 17, 2022

Center Bulkhead, F-705 Bulkhead

I had never fully installed the control sticks and control column to see if my bushing sizes were correct, so I decided to take a step backwards and do that to test fit everything (it'll get tight once the seat ribs are in). It all fit really well.  I disassembled it all, bagged the hardware and taped it to the control columns, and stored it for later.


Back to the F-705 bulkhead:

The center section bar and bar doubler get match drilled to the rear spar attach bulkhead.  I drew a line down the middle of the long bar to line up with the pre-punched holes.  There are no measurements in the drawings or instructions to say where any of the holes actually go, but logically it should all be centered (the bar and F-F05A bulkhead aren't the same length).  The double check of the center hole showing my center and horizontal lines meant it was time to drill.


I probably could have just drilled the bar by hand using the holes in the F-705A bulkhead as a guide, but with the thickness of the bar I was worried about not drilling straight, especially once the next layer of the doubler gets drilled.  I've learned that rivet holes that aren't perpendicular to the surface end up being an absolute bear to rivet.  Of course the same goes for bolt holes.  It was awkward, but I used the drill press to drill all of the holes.


I was worried about the clamps not holding the bar, doubler, and bulkhead solid while drilling through it all, so I split it into two operations.  I drilled all of the holes in the bar first, then used that as a guide to drill the doubler (and spacers).  For reference, this is the bulkhead that will sandwich the ends of the rear wing spar.


Sunday, October 16, 2022

Bulkheads

I started out easy this afternoon - riveted nutplates to the cover support ribs and riveted/bolted the large ribs to the fore center bulkhead.  The smaller, outer two ribs can't be attached until I have the material to make spacers that go on the back side of the bulkhead.  Doing the dance of back ordered parts is going to get tough if it carries on too long.


Moving on to the next bulkhead...hopefully I have most of the material I need!  This one is the bulkhead that goes between the seats and the baggage compartment.  The plans just say to put a few parts together and drill some holes.  What they don't say is that all of the parts have to be made first.  It's hard to describe what I did, simply because there are so many pieces in the fuselage that most don't have actual names, unlike being able to describe ribs and spars in the wings. I cut the F-705B center section bar to length, then cut an angle into each end (I think this helps with the wing rear spar clearance).  The F-705H spacers were next, cut out of some 1/4" bar stock.


Thankfully Van's pre-bends the F-605C bar doubler, so it just has to be cut to the right dimensions.  I trimmed it to length and got the rest of the shape drawn out, but I think I'll wait to actually cut it until I have gotten all of the holes drilled.


Saturday, October 15, 2022

Fuselage Skin Priming

Catching up on a few pictures from the last few days:  I bolted/torqued the control stick bases to the aft center section


The front center section has 4 "cover support" ribs that get attached to the front side.  My best guess is that these are what the flooring under the seats wraps around and attaches to.  Each rib gets 3 large holes (all different size) drilled into them for fuel lines, brake lines, and electrical routing.


That brings me to today.  The weather looked like it would hold out, so I decided to prime all of the fuselage skins.  Everything that isn't visible in the cockpit I primed with the same Ekoprime I've always used.  For the side skins, floor skins, and fore most upper skin in the tail cone that extends into the baggage compartment, I used Ekopoxy.  This is a 2 part epoxy primer that is supposedly quite a bit tougher than the Ekoprime.  I figure if it's tough enough, I can probably get away without painting the cockpit interior.  Most of the cockpit will be covered with carpet and wall coverings anyway, so very little will be visible.  I ordered the company's next lighter grey shade, thinking the light color would help make the cockpit seem a little bigger.  It's far lighter than I thought it would be, but it'll be fine once most of it's all covered up.  I definitely prefer shooting the regular Ekoprime.  It's far easier.  The epoxy has to be mixed with a catalyst and water, and it is still fairly thick to shoot.  I used a larger tip on the spray gun, but I still had trouble with it clogging.  I'm not sure how even the primer ended up laying down.  I can't really tell until it's dry.


Monday, October 10, 2022

Skin Deburring & Center Bulkhead

I finished deburring the edges of the skins today.  I still haven't decided if I'm going to prime them all ahead of time or not, but at least the edges are done when I do.

The two bases of the control sticks get bolted to the aft center section. They come as some angle with a bearing pressed in.  I located and drilled the top bolt hole and marked out the areas that can be cut out of the base (for weight savings - every little bit helps).


The two bases (one for the left stick and one for the right stick) were bolted to the aft center section and then clamped at a right angle to the top flange.  Then I drilled the second bolt hole at the bottom of the angle using the pre-drilled hole in the center section as a guide.


I contemplated not bothering to cut out the "weight savings" portion, but in the end decided I might as well.


The next step was to take the left and right sticks and trim the bearing surfaces to create a slip fit into the connecting arm that goes between the left and right sticks.  I ended up having to take off a good 1/16" of the bearing and about the same of the steel itself.  I'll bolt everything together and take a picture later - it'll make more sense then.  I'm waiting on the primer to dry on the aluminum angle bases before I put it all together.


The top flanges of the center sections get a bunch of nutplates (I'm not sure what for, but I'm assuming the seat pans?), so I countersunk all of the nuplate rivet holes and installed the nutplates.